6. UDP Server Example Explanation#
1. Environment Preparation#
To ensure a smooth demonstration of UDP communication, we need to confirm that the following environment is correctly configured:
1.1 Hardware Connection#
Ensure that your CanMV development board and computer are connected to the same router or switch via Ethernet cable, forming a local area network (LAN).
Ensure that the router or switch is functioning properly to maintain a stable network connection.
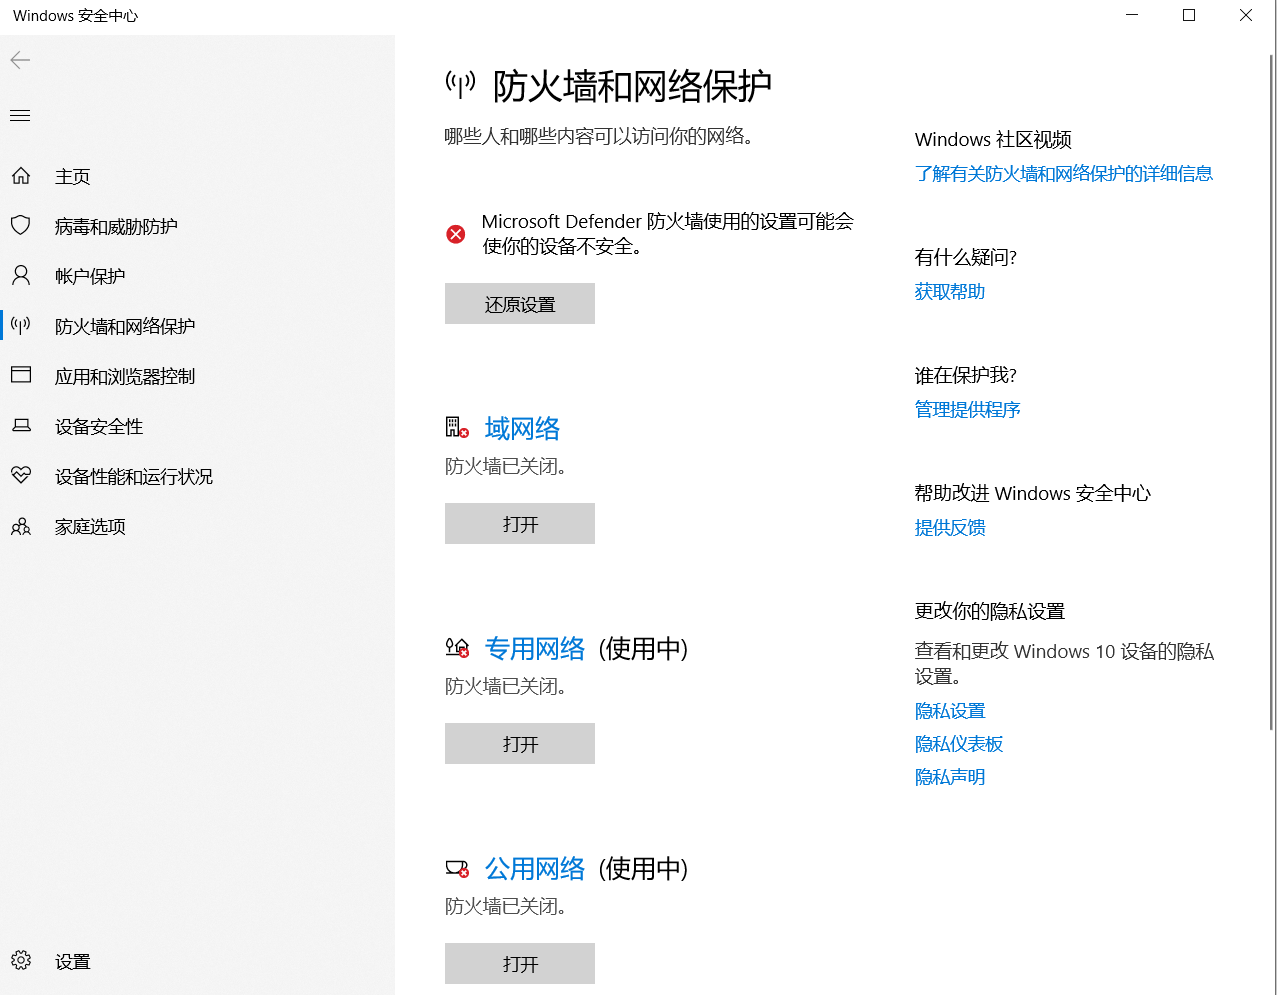
1.2 Disable Firewall#
To prevent the firewall from blocking UDP communication, it is recommended to temporarily disable the firewall on your computer.
1.3 Tool Preparation#
Download and install NetAssist Network Debug Assistant as a network communication testing tool to help with sending and receiving network data.
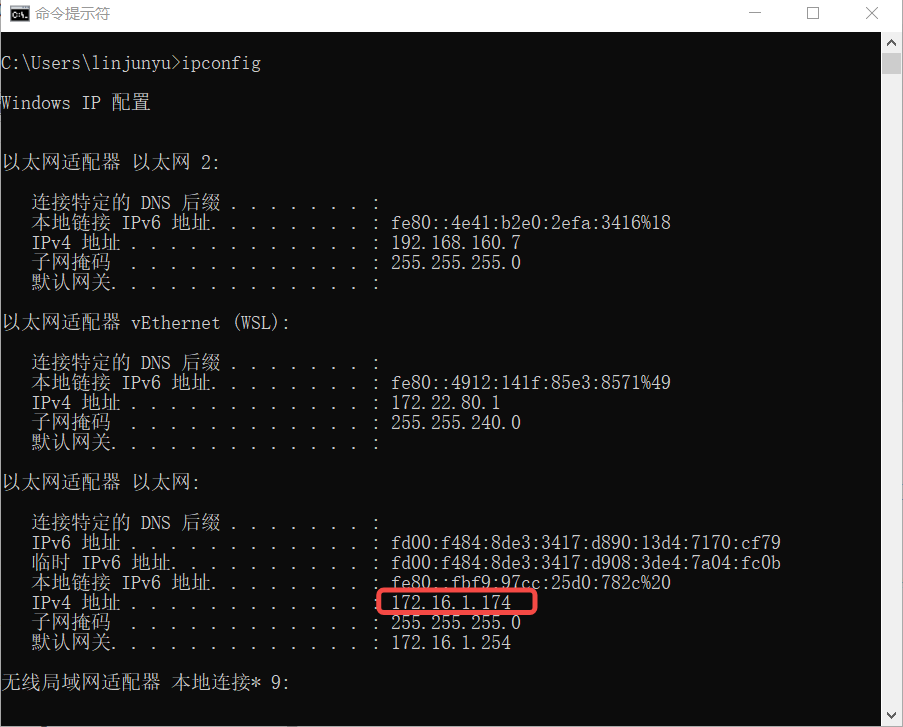
1.4 Obtain IP Address#
Open the command prompt (CMD), enter
ipconfig, and query and record the IP address of the computer’s network card for subsequent configuration and testing.
2. Server Example Analysis#
This example demonstrates how to create a simple UDP server, including configuring the network interface, creating a socket, binding the address and port, receiving and sending data, and closing the socket. Through this example, you can learn how to build a basic network communication application.
2.1 Import Necessary Libraries#
import socket
import network
import time
socket: Used to create sockets, which are the basis of network communication.network: Used to configure network interfaces, such as LAN or WLAN.time: Used for delay processing, which may be used for timeout control in network requests.
2.2 Configure Network Interface#
def network_use_wlan(is_wlan=True):
    if is_wlan:
        sta = network.WLAN(0)
        sta.connect("Canaan", "Canaan314")
        print(sta.status())
        while sta.ifconfig()[0] == '0.0.0.0':
            os.exitpoint()
        print(sta.ifconfig())
        ip = sta.ifconfig()[0]
        return ip
    else:
        a = network.LAN()
        if not a.active():
            raise RuntimeError("LAN interface is not active.")
        a.ifconfig("dhcp")
        print(a.ifconfig())
        ip = a.ifconfig()[0]
        return ip
This code configures the network interface based on the input parameters, following these steps:
WLAN Mode:
If
is_wlan=True, configure the wireless network interface (WLAN) and connect to the specified Wi-Fi network (SSID “Canaan”, password “Canaan314”).Output the WLAN connection status and wait for a valid IP address to be assigned.
After a successful connection, print the network configuration and return the IP address.
LAN Mode:
If
is_wlan=False, configure the wired network interface (LAN).Activate the LAN interface and check its status. If not activated, raise an exception.
Use DHCP to obtain an IP address, print the network configuration, and return the IP address.
2.3 Create UDP Socket#
# Create UDP socket
s = socket.socket(socket.AF_INET, socket.SOCK_DGRAM)
# Set socket options to allow address reuse
s.setsockopt(socket.SOL_SOCKET, socket.SO_REUSEADDR, 1)
# Get address and port number and bind socket
ai = socket.getaddrinfo(ip, 8080)
addr = ai[0][-1]
s.bind(addr)
We created a UDP-type socket and set the SO_REUSEADDR option to allow address reuse. Then, we used getaddrinfo to get the address and port number information and bound the socket to that address and port.
2.4 Receive and Send Data#
# Delay 1 second to ensure socket binding is complete
time.sleep(1)

# Receive data and reply
for j in range(10):
    try:
        data, addr = s.recvfrom(800)  # Receive data, up to 800 bytes
        print("Received:", data, "from", addr)
        # Reply with a message containing the received data and receive count
        response = b"%s have recv count=%d " % (data, j)
        s.sendto(response, addr)
    except Exception as e:
        print("Error:", e)  # Print exception information for debugging

# Close socket
s.close()
print("UDP Server exited!!")
The program receives up to 800 bytes of data using the recvfrom method and prints the received data and client address. Then, it constructs a reply message and sends it using sendto. The program includes exception handling to capture and debug errors.
2.5 Complete Example#
# Configure TCP/UDP socket debugging tool
import socket
import time, os
import network

def network_use_wlan(is_wlan=True):
    if is_wlan:
        sta = network.WLAN(0)
        sta.connect("Canaan", "Canaan314")
        print(sta.status())
        while sta.ifconfig()[0] == '0.0.0.0':
            os.exitpoint()
        print(sta.ifconfig())
        ip = sta.ifconfig()[0]
        return ip
    else:
        a = network.LAN()
        if not a.active():
            raise RuntimeError("LAN interface is not active.")
        a.ifconfig("dhcp")
        print(a.ifconfig())
        ip = a.ifconfig()[0]
        return ip

def udpserver():
    # Get LAN interface IP address
    ip = network_use_wlan(True)

    # Get address and port number corresponding address
    ai = socket.getaddrinfo(ip, 8080)
    print("Address infos:", ai)
    addr = ai[0][-1]

    print("udp server %s port:%d\n" % (ip, 8080))
    # Establish socket
    s = socket.socket(socket.AF_INET, socket.SOCK_DGRAM)
    s.setsockopt(socket.SOL_SOCKET, socket.SO_REUSEADDR, 1)
    s.bind(addr)
    time.sleep(1)  # Delay 1 second to ensure socket is ready

    counter = 0
    while True:
        os.exitpoint()
        data, addr = s.recvfrom(800)
        if data == b"":
            continue
        print("recv %d" % counter, data, addr)
        s.sendto(b"%s have recv count=%d " % (data, counter), addr)
        counter += 1
        if counter > 10:
            break
    s.close()
    print("udp server exit!!")


#main()
udpserver()
For specific interface definitions, please refer to socket and network.
3. Example Phenomenon and Operation Instructions#
After running the code, the serial terminal will output the server’s IP address and port number information:

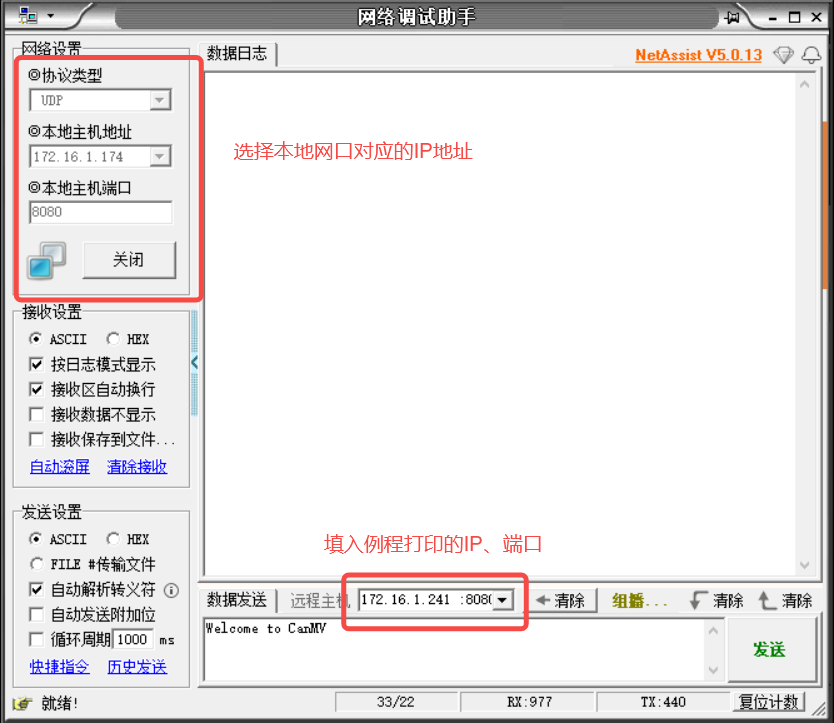
In the network debugging assistant, select UDP and configure the connection parameters:
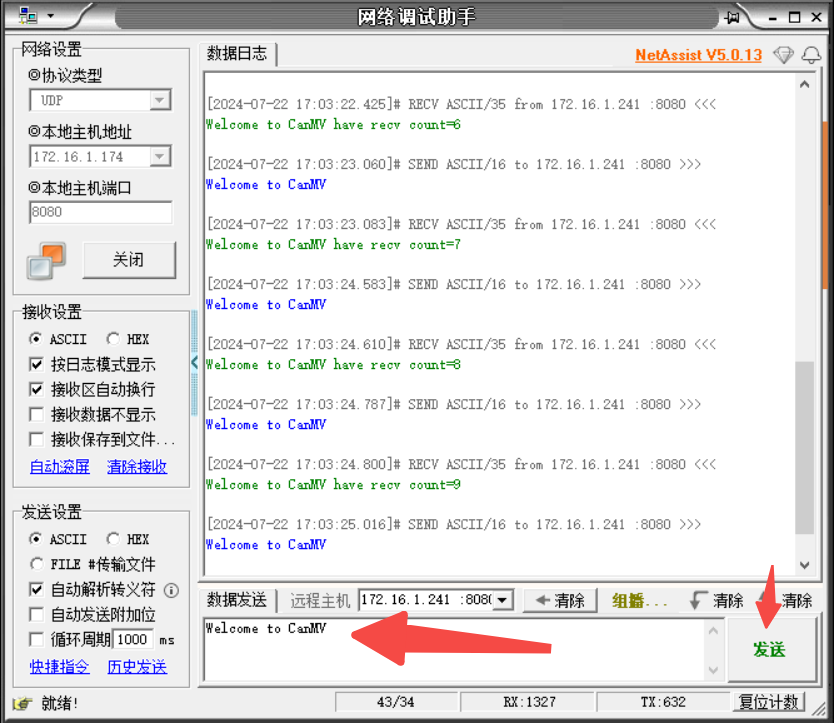
Send data and observe the server’s response: