K230 SDK EVB Board Demo User Guide#
Copyright 2023 Canaan Inc. ©
Disclaimer#
The products, services or features you purchase should be subject to Canaan Inc. (“Company”, hereinafter referred to as “Company”) and its affiliates are bound by the commercial contracts and terms and conditions of all or part of the products, services or features described in this document may not be covered by your purchase or use. Unless otherwise agreed in the contract, the Company does not provide any express or implied representations or warranties as to the correctness, reliability, completeness, merchantability, fitness for a particular purpose and non-infringement of any statements, information, or content in this document. Unless otherwise agreed, this document is intended as a guide for use only.
Due to product version upgrades or other reasons, the content of this document may be updated or modified from time to time without any notice.
Trademark Notice#
 , “Canaan” and other Canaan trademarks are trademarks of Canaan Inc. and its affiliates. All other trademarks or registered trademarks that may be mentioned in this document are owned by their respective owners.
Copyright 2023 Canaan Inc.. © All Rights Reserved. Without the written permission of the company, no unit or individual may extract or copy part or all of the content of this document without authorization, and shall not disseminate it in any form.
Directory#
[TOC]
preface#
Overview#
This document mainly introduces the demo program provided in the K230 SDK.
Reader object#
This document (this guide) is intended primarily for:
Technical Support Engineer
Software Development Engineer
Definition of acronyms#
abbreviation |
illustrate |
|---|---|
UVC |
USB video class(USB Camera) |
VVI |
Virtual Video Input, which mainly used for pipeline debugging |
Revision history#
Document version number |
Modify the description |
Author |
date |
|---|---|---|---|
V1.0 |
Initial |
System Software Department |
2023-03-10 |
V1.1. |
Add description of VICAP、DPU demo、UVC demo |
System Software Department |
2023-04-07 |
V1.2. |
Add multi-channel venc encoding demo, add vi->venc->MAPI-> little core storage file demo; Updated VICAP usage instructions ,which support multi-channel output 、 scaling and cropping of output image; Existing demos all support sharefs to load or save audio files; Add encoding demo: ai->aenc->file Add decoding demo: file-> adec->ao; Add audio synthesis demo: ai->aenc adec->ao; UVC demo big core end execution command modification; Add MAPI video encoding demo operation description; Add VICAP, KPU, VO joint debugging demo; |
System Software Department |
2023-05-06 |
V1.3 |
Modify the instructions for using venc demo, vdec demo, and nonai_2d demo; Added RTSP push demo description |
System Software Department |
2023-5-31 |
V1.4 |
Add ShareFs usage instructions |
SDK Department |
2023-6-1 |
V1.5 |
Add voice intercom demo description |
SDK Department |
2023-6-12 |
V1.6 |
Add DRM demo and LVGL demo |
SDK Department |
2023-6-29 |
V1.7 |
Modify the sensor parameter in the venc demo, and add the MAPI VDEC bound VO decoding display in the vdec demo |
SDK Department |
2023-6-30 |
V1.8 |
Modify the instructions for using the MAPI sample_venc and rtsp_demo |
SDK Department |
2023-7-1 |
V1.9 |
Modify the vicap demo instructions to support multiple sensor inputs |
SDK Department |
2023-8-1 |
V2.0 |
Modify the test command of the UVC demo |
SDK Department |
2023-8-30 |
1. Overview#
This document describes the demo functions and usage methods provided by the K230 SDK. The executable programs on rt-smart are compiled into /sharefs directory of the little core by default.When testing the big core program, you need to wait for the little core to be fully started, and then the big core enter the /sharefs/app directory to test. The audio and video resource files used in the test demos can be obtained at the following link address https://kendryte-download.canaan-creative.com/k230/downloads/test_resource/
2. Demo introduction#
2.1 Display_demo#
2.1.1 Introduction to display_demo#
VO (Video Output) module actively reads video and graphics data from the corresponding location in memory, and outputs video and graphics through the corresponding display device. Display/write-back devices, video layers, and graphics layer conditions supported by the chip.
2.1.2 Feature description#
Video output contains three cases, one is the self-test mode of DSI, the binding test of VO and VVI, and the test of VO layer inserting frames
2.1.3 Dependent Resources#
A screen is required
2.1.4 Instructions for Use#
2.1.4.1 Compilation#
Software compilation refers to the README.md in the release SDK package
2.1.4.2 Execution#
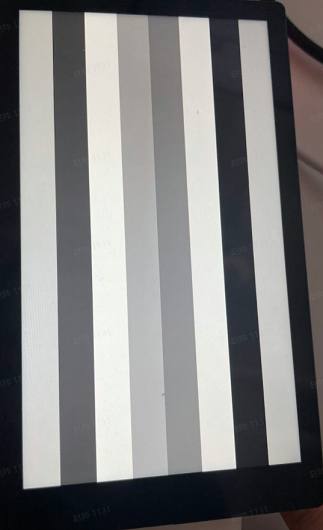
DSI self-test mode demo run command:
./sample_vo.elf 2
An image of the Color Bar is displayed on the screen, as follows:
VO and VVI bind demo run command:
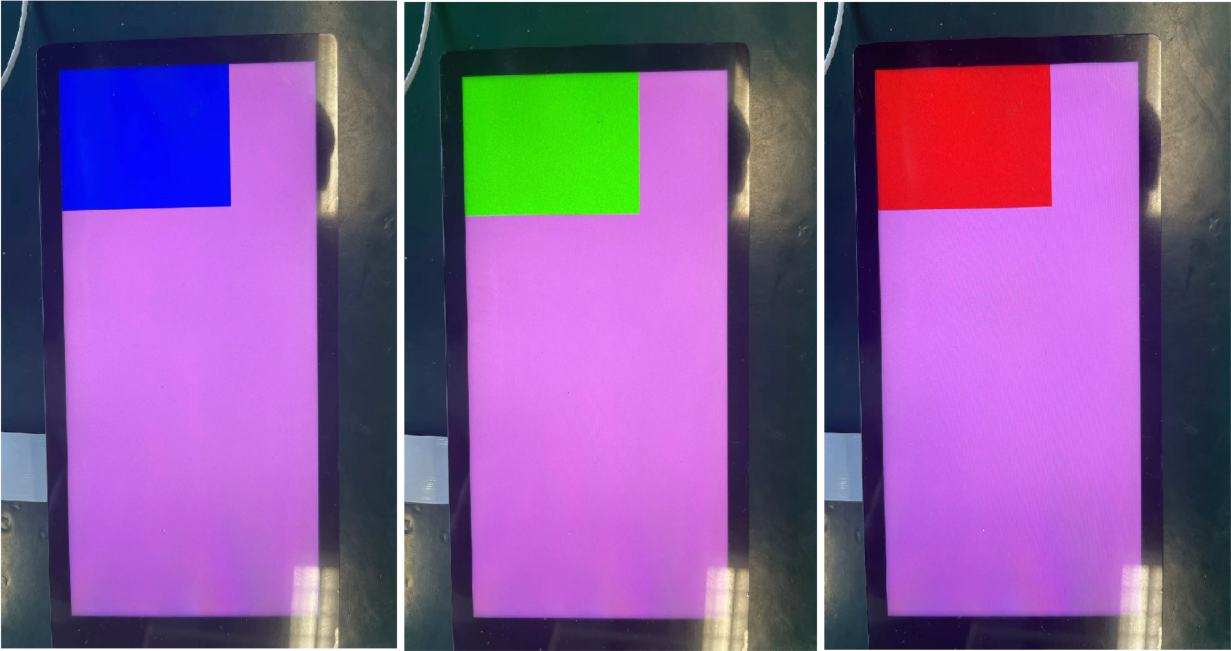
./sample_vo.elf 9when press Enter key once,VVI start sending argb data,press Enter key again, the program exits.
The display effect is alternating red, green and blue primary colors, and the effect is as follows:
VO layer inserts frames demo run command:
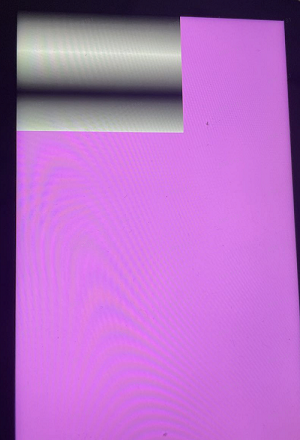
./sample_vo.elf 7After executing the command, press Enter key to insert a picture from the user layer, and press Enter again to exit
The display effect is as follows:
2.2 Venc_demo#
2.2.1 Introduction to Venc_demo#
Venc demo encodes the graphics received by vi, and can frame and OSD overlay the input image. The supported encoding protocols are H.264/H.265/JPEG. The encoding results can be stored as a file, exported to the local computer, and played back using video software.
2.2.2 Feature description#
Only 1280x720 resolution is supported.
2.2.3 Dependent Resources#
Camera
2.2.4 Instructions for Use#
2.2.4.1 mpp_demo Execution#
After execution./sample_venc.elf -h, the instructions for using the demo are output as follows:
Usage : ./sample_venc.elf [index] -sensor [sensor_index] -o [filename]
index:
    0) H.265e.
    1) JPEG encode.
    2) OSD + H.264e.
    3) OSD + Border + H.265e.

sensor_index: see vicap doc
For the value of sensor_index, please refer to the description of k_vicap_sensor_type in the document k230_docs/en/01_software/board/mpp/K230_Camera_Sensor_Adaptation_Guide.md. The default value is 7
Example:
./sample_venc.elf 0 -sensor 7 -o out.265
2.2.4.2 MAPI encoding demo#
sample_venc default sensor type used is IMX335_MIPI_2LANE_RAW12_1920X1080_30FPS_LINEAR, the demo currently supports 3-way encoding, you can modify the sensor type and other parameters by passing parameters from the command line, the specific description is as follows:
After launching the board:
Use
lsmodto check whether the k_ipcm module is loaded on the little core side. If it is not loaded, executeinsmod k_ipcm.koto load the k_ipcm module.Start the internuclear communication process on the large nuclear side, execute
./sample_sys_inif.elfIn the /mnt directory on the little core side, execute ,
./sample_vencby default, 1-channel H264 video encoding is executed, the resolution is 1280x720, and the generated code stream file is stored under the /tmp directory
Usage: ./sample_venc -s 0 -n 2 -o /tmp -t 0
                     -s or --sensor_type [sensor_index],\n");
                            see vicap doc
                     -n or --chn_num [number], 1, 2, 3
                     -t or --type [type_index]
                            0: h264 type
                            1: h265 type
                            2: jpeg type
                     -o or --out_path [output_path]
                     -h or --help, will print usage
sensor_index value refer to the k230_docs/en/01_software/board/mpp/K230_Camera_Sensor_Adaptation_Guide.mddescription of the k_vicap_sensor_type in the document, and the default value is 7
Depending on the encoding type, different stream files will be generated in the output directory specified by the little core, for the H264 type, a file will be generated, where 0 represents 0 channel, ctrl+cfor the H265 type, a file of the form will be generated, and the same 0 will stream_chn0.264represent 0 channel; for the JPEG type, the shape will be generatedstream_chn0.265``chn0_0.jpgThe jpg image represents the 0th image of channel 0, and 10 jpg images will be generated by default.
2.2.4.3 View results#
The output file can be exported locally for viewing with video playback software.
2.3 Nonai_2d_demo#
2.3.1 Introduction to Nonai_2d_demo#
Nonai_2d demo implements the function of image overlay on the input file.
2.3.2 Feature description#
Nonai_2d performs image overlay operations by reading a YUV (I420 format) file.
2.3.3 Dependent Resources#
None
2.3.4 Instructions for Use#
The input parameters are as follows:
The parameter name |
description |
Default value |
|---|---|---|
-i |
Enter a file name |
- |
-in |
Image width |
- |
-h |
Image height |
- |
-or |
Output file name |
- |
2.3.4.1 Execution#
Example:
./sample_nonai_2d.elf -i /sharefs/foreman_128x64_3frames.yuv -w 128 -h 64 -o /sharefs/out_2d.yuv
2.3.4.2 View results#
The output file can be exported to the local computer for viewing with the YUV playback software.
2.4 Vdec_demo#
2.4.1 Introduction to Vdec_demo#
Vdec demo implements the function of video decoding. The decoding function supports H.264/H.265/JPEG decoding. The supported input data formats are .264/.264/.jpeg.
2.4.2 Feature description#
Vdec demos are decoded by reading stream files. The decoding output is displayed on the screen.
2.4.3 Dependent Resources#
None
2.4.4 Instructions for Use#
2.4.4.1 Execution#
Execute, ./sample_vdec.elf -helpyou can see the configurable parameters and descriptions, the default values of which are shown in the following table:
The parameter name |
illustrate |
Default value |
|---|---|---|
i |
Enter a file name, which needs to be suffixed .264/.265/.jpg |
- |
type |
vo connector type, please refer to vo document |
0 |
The type value is set to 0 in thek230_docs/en/01_software/board/mpp/K230_video_output_API_reference description of the k_connector_type
2.4.4.1.1 VDEC bound VO decoding display#
./sample_vdec.elf -i canaan.264
2.4.4.1.2 MAPI VIDEC bound VO decoding display#
./sample_vdec.elf -i canaan.264
2.4.4.2 View results#
The decoding result can be viewed on the screen.
2.5 Audio_demo#
2.5.1 Introduction to audio_demo#
Audio Demo implements audio input and output functions by calling API interfaces. The audio input includes I2S and PDM modules, and the audio output includes the I2S module. The demo includes use cases where audio input or audio output can be tested separately, as well as use cases where audio input and output can be tested at the same time.
2.5.2 Feature description#
2.5.2.1 Audio input#
Audio input analyzes whether it is normal by capturing sounds from the environment and saving them as files.
The audio input includes the test of I2S and PDM modules, and the audio data of 15S clock is collected in the demo, and the file format collected is WAV, which can be played directly using VLC. There are 2 groups of i2S audio inputs, and group 0 is used as the audio input by default in the demo. There are 4 groups of PDM audio inputs, and group 0 is used as the audio input by default in the demo.
2.5.2.2 Audio output#
The audio output is judged by playing the WAV file, plugging in the headphones to listen to the sound.
The audio output only includes the I2S module test, and the audio output function is tested by playing WAV in the demo, and WAV files of different audio formats can be uploaded to test the audio output function. There are 2 groups of i2S audio outputs, and group 0 is used as the audio output by default in the demo.
2.5.2.3 Audio input and output#
Audio input and output can be tested at the same time.
Test the function of the I2S module, that is: real-time acquisition of sound in the environment through the I2S audio input and sound in the environment through the I2S audio output, and connect the headphones to hear the sound in the environment in real time.
Test the function of the PDM module, that is: real-time acquisition of ambient sound through PDM audio input and I2S audio output, plugging in headphones to hear the sound in the environment in real time.
2.5.2.4 Audio codec#
Built-in G711A/U 16bit audio codec, users can register other external codecs.
2.5.2.5 Data Links#
The audio codec receives the signal from the analog microphone, converted into the PCM data in the I2S format, and input into the I2S in audio; the PCM data output by I2S, after the audio codec, becomes an analog signal emitted, the mode does not use digital IO, fixed use of I2S sdi0 and sdo0 interface.
I2S interfaces directly with off-chip digital microphones and PAs. There are two sets of interfaces to choose from: SDI0, SDO0, and SDI1, SDO1.
Off-chip PDM microphone with up to 8 PDM data inputs to Audio’s 4 input data interfaces.
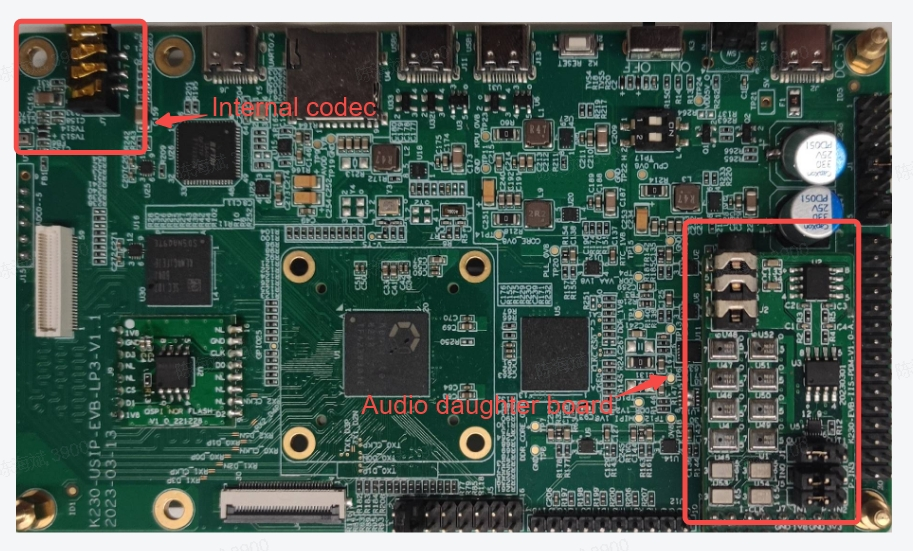
You can use the built-in codec or an external device (audio daughter board) to test audio-related functions. Use the built-in codec to test one set of I2S audio input and output and audio codec related functions, and use the audio daughter board to test 2 sets of I2S audio input and output and 4 groups of PDM audio input functions.
2.5.2.6 Precautions#
The built-in codec supports 24bit maximum sampling accuracy, 32bit does not; therefore, when using the built-in codec to test I2S audio input and output, only 16/24 bit sampling accuracy is supported.
The audio daughter board I2S transmits and receives loopback test, and only supports 32-bit sampling accuracy. Here’s why:
Audio daughter board acquisition uses MSM261S3526Z0CM silicon microphone, in I2S Philips format, and audio daughter board output uses codec TM8211, i2S right-aligned format, 16-bit sampling. Because the I2S module uses the same WS, only one I2S alignment format can be configured when sending and receiving are running at the same time. In order to obtain audio data correctly, MSM261S3526Z0CM silicon microphones need to be adapted, so the i2s transceiver is configured for I2S Philips format. However, the output is in right-aligned format, so the output data loses accuracy. However, when using 32-bit precision to send and receive, it is not displayed in the I2S-aligned format, so it has no effect.
If you test audio input or audio output separately, 16/24/32bit is supported, regardless of sampling accuracy.
When using the audio daughter board to capture audio, the sample rate supports the range (8K~48K).
THE AUDIO DAUGHTER BOARD ACQUISITION MODULE USES A MSM261S3526Z0CM SILICON MICROPHONE WITH A MAXIMUM CLOCK OF 4MHZ. WHEN SAMPLING RATES ARE 96k (6.144MHZ) AND 192k (12.288MHZ), THE SOUND CAPTURED FROM THE AUDIO DAUGHTER BOARD IS ABNORMAL.
2.5.3 Dependent Resources#
Audio tests rely on audio daughter boards.
The audio daughter board schematic is as follows:
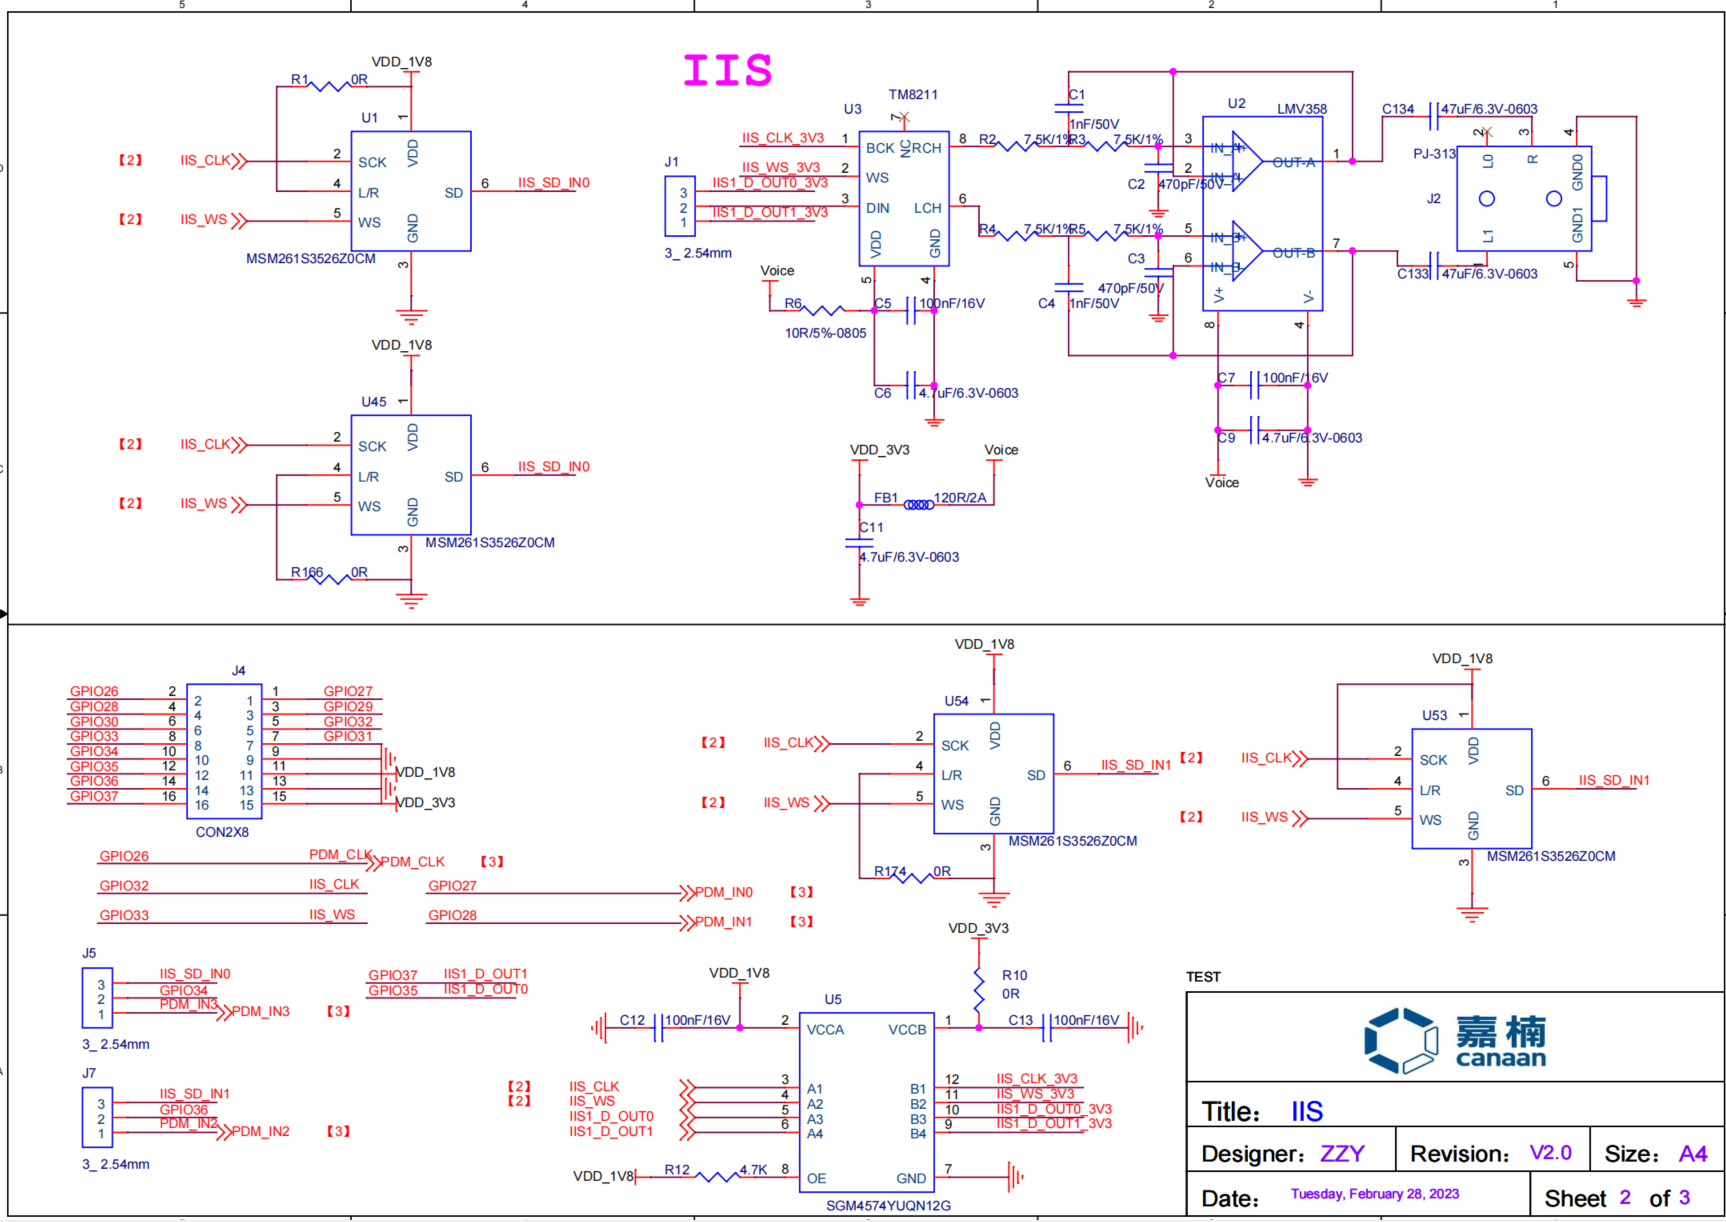
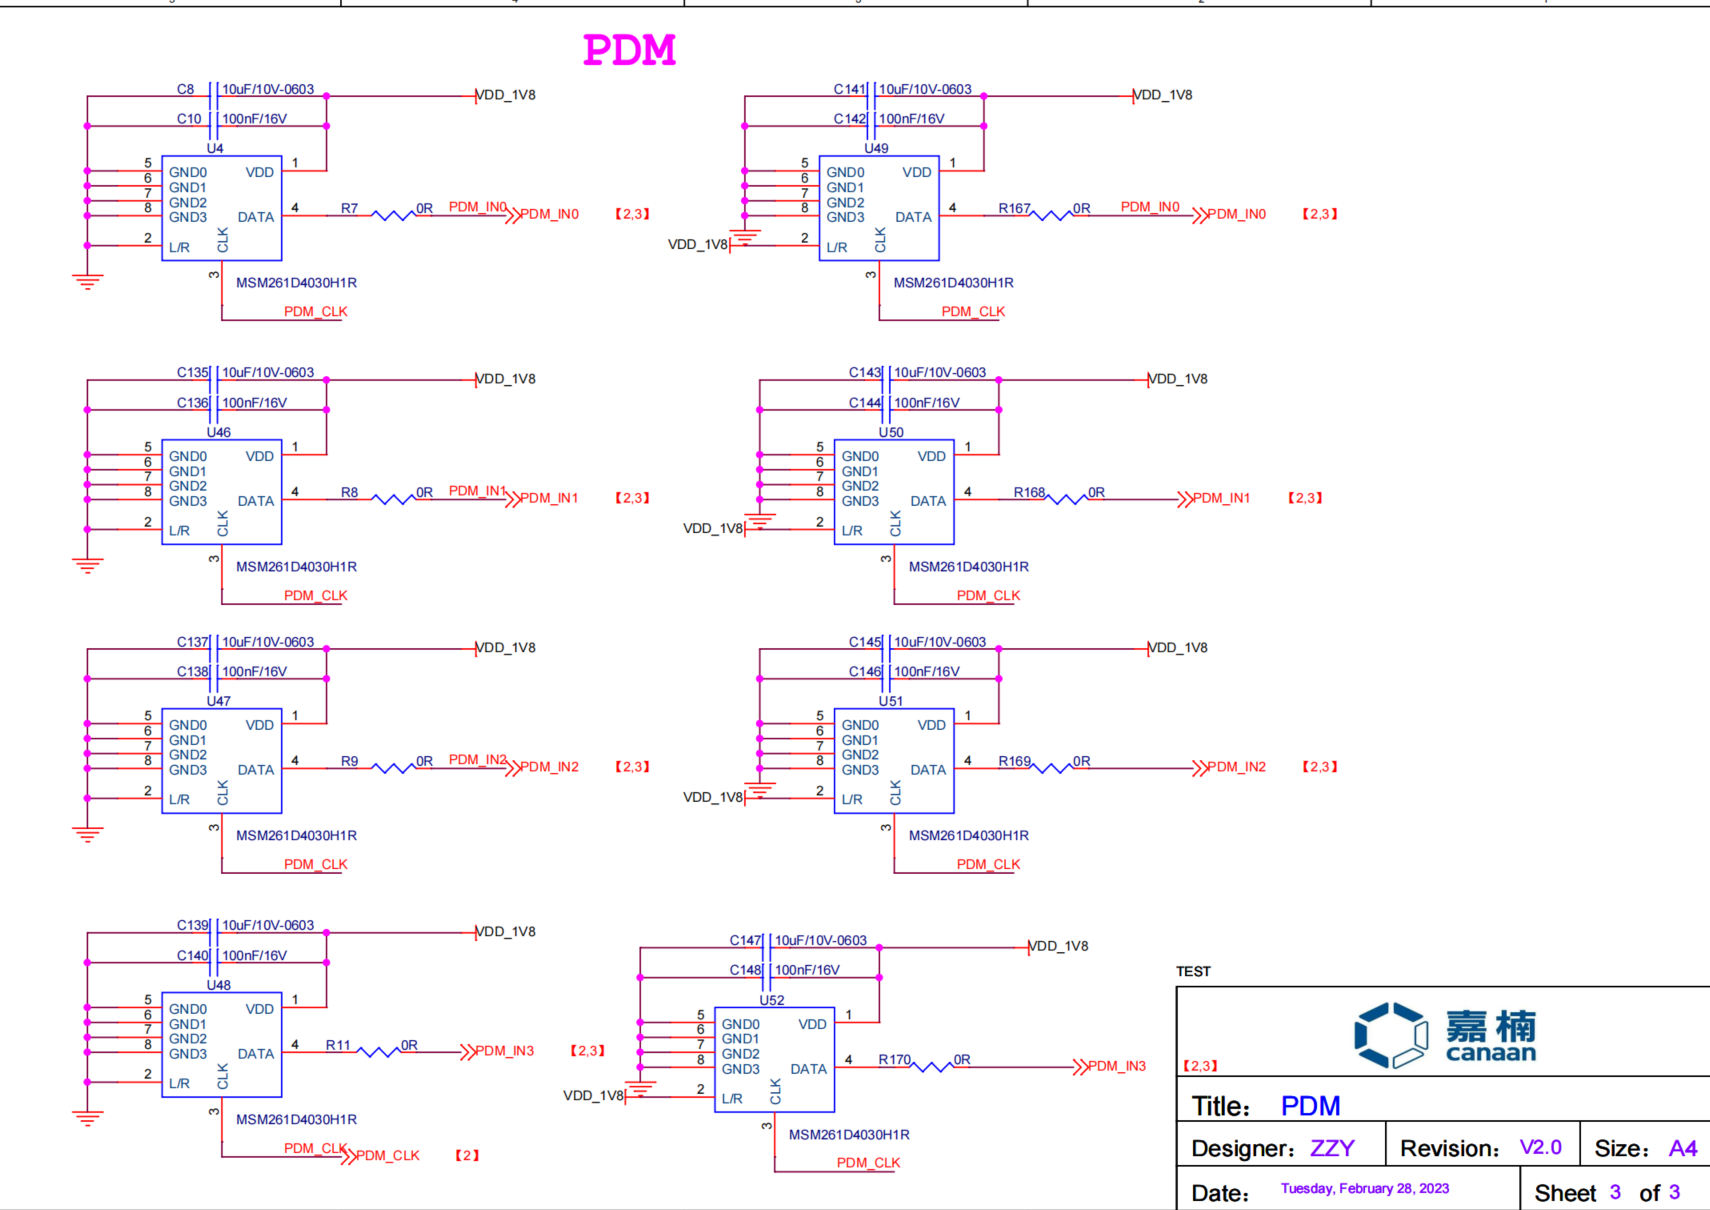
When testing I2S input and output, the audio daughter board can be connected via jumper caps as follows:
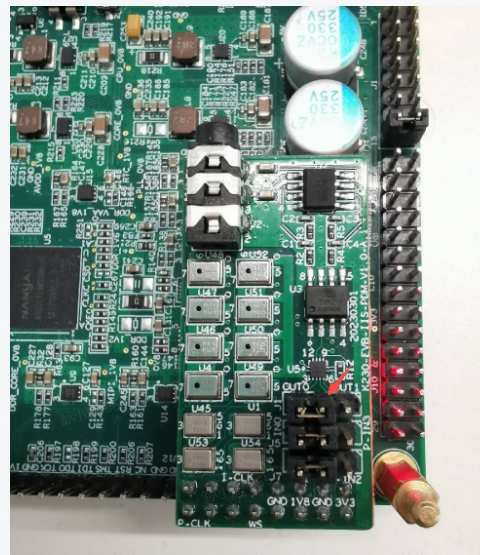
PDM audio acquisition, when acquiring group 0 PDM channel or group 1 PDM channel data, the use pin does not conflict with the I2S pin.
When using Group 2 and Group 3 PDM channels, it is necessary to switch to PDM channel mode using jumper caps, as follows:

2.5.4 Instructions for Use#
2.5.4.1 Compilation#
For a detailed description of the software compilation environment, refer to the SDK
README.md.Set up a sharefs environment, and rely on sharefs to read and write files.
2.5.4.2 Execution#
After entering the rt-smart system, enter the /sharefs directory tosample_audio.elf test the demo.
You can enter
./sample_audio.elf -helphow to view the demo.-typeoption to test different module functionality;-samplerateOption to configure audio input and output different sample rates (8K-192K), default is 44.1K;-enablecodecUse a built-in codec or off-chip audio daughter board;-loglevelPrint the kernel log level;-bitwidthSet audio sampling accuracy (16/24/32);-filenameLoad or store the WAV/G711 file name.
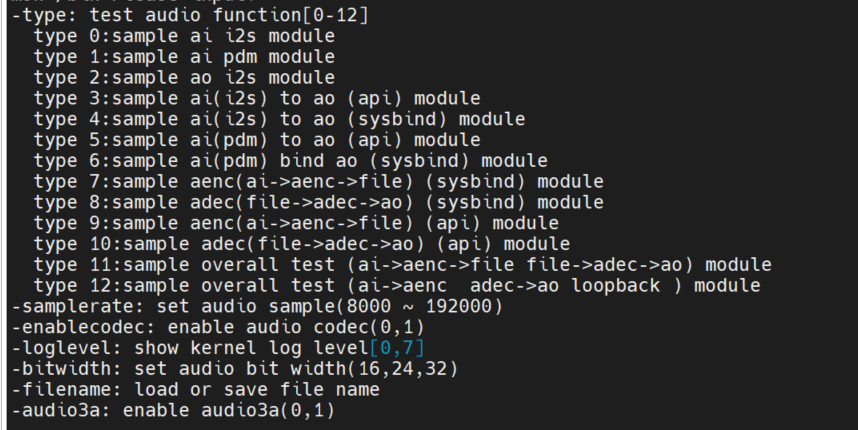
2.5.4.2.1 I2S audio input test#
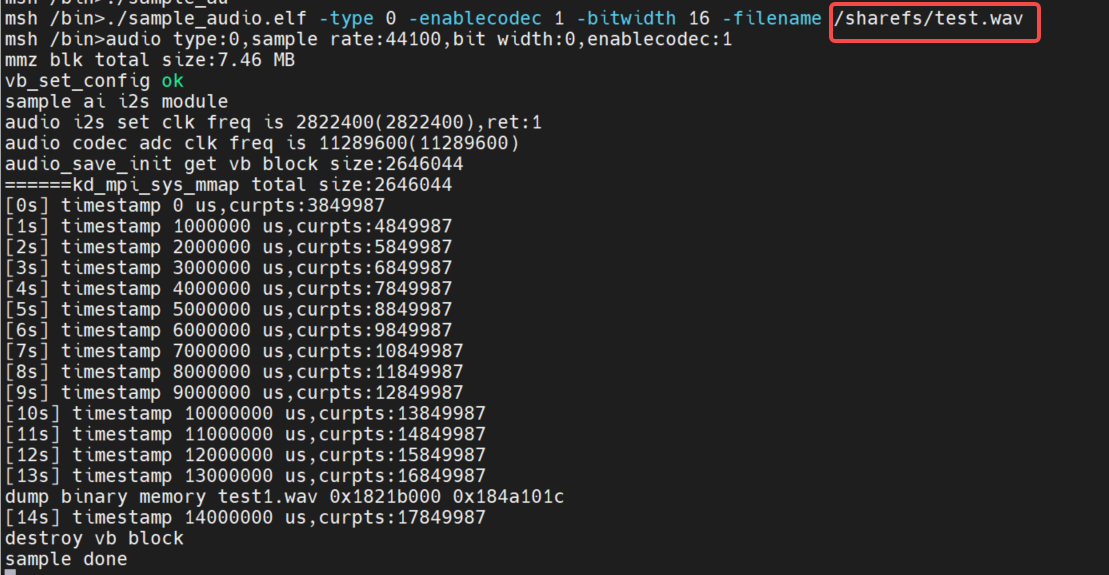
Input
./sample_audio.elf -type 0to acquire PCM audio data in 15S-samplerateoption to choose to capture audio at different sample rates,-bitwidthto set different sampling accuracy,-enablecodecSet whether to use the built-in codec,-filenameSave the data to a file. After collecting 15s data, the demo automatically exits.
Demo implementation idea: This test collects data by calling the API function: AND in a loopkd_mpi_ai_get_frame``kd_mpi_ai_release_frame. Note that the AI dev number corresponding to i2s is 0.
2.5.4.2.2 PDM audio input test#
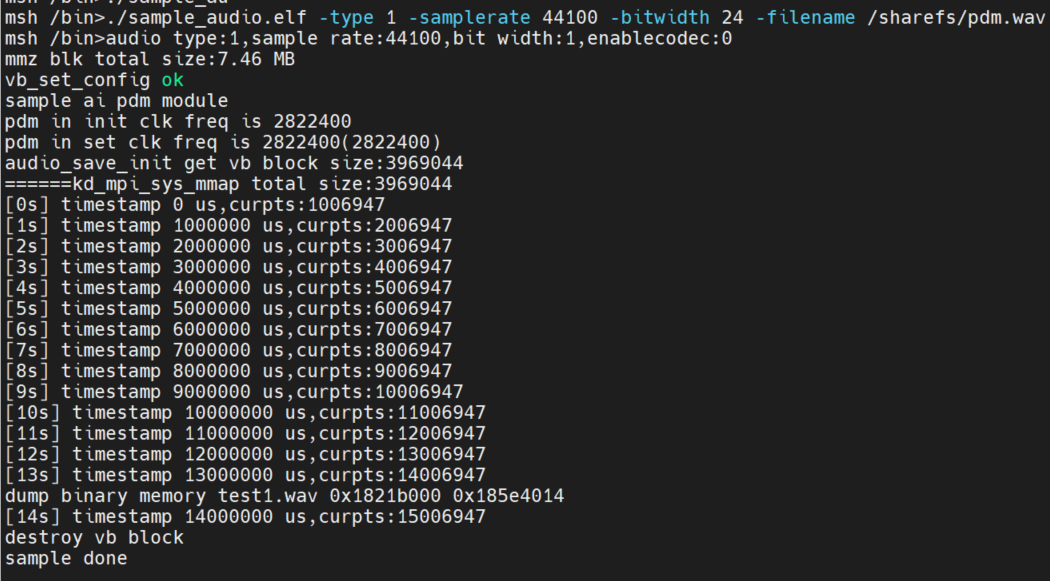
Input
./sample_audio.elf -type 1to acquire PCM audio data in 15s-samplerateoption to choose to capture audio at different sample rates-bitwidthto set different sampling accuracy-enablecodecSet whether to use the built-in codec. After collecting 15s data, the demo automatically exits and saves the data to a file.
Demo implementation idea: This test collects data by calling the API function: AND in a loopkd_mpi_ai_get_frame``kd_mpi_ai_release_frame. Note that the AI dev number corresponding to PDM is 1
2.5.4.2.3 I2S audio output test#
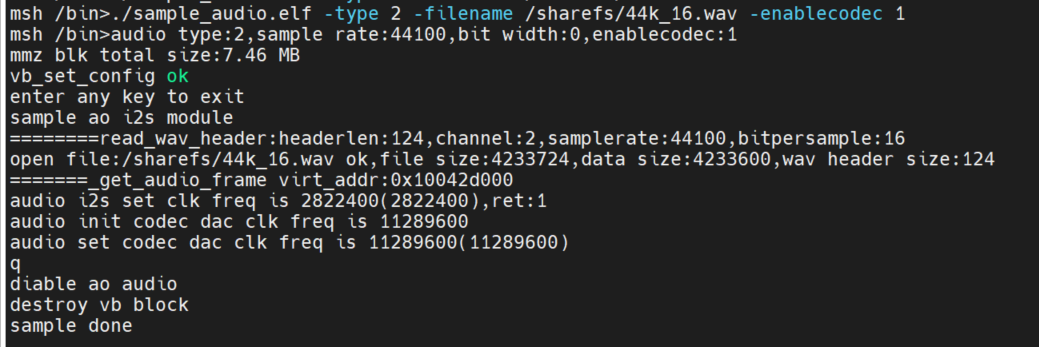
To support playback of WAV files, you need to copy the WAV file to the sharefs path. The demo will loop the WAV file (any other WAV file can also be used), and the user can press any key to exit the function test.
Demo implementation idea: This test outputs sound in real time by calling API functions in a loopkd_mpi_ao_send_frame.
2.5.4.2.4 I2S audio input and output API interface test#
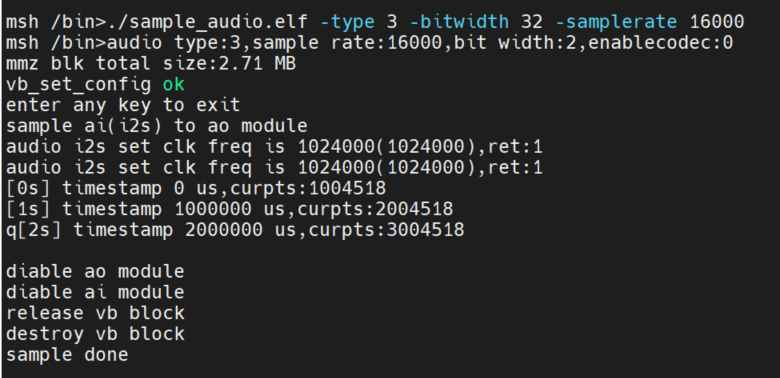
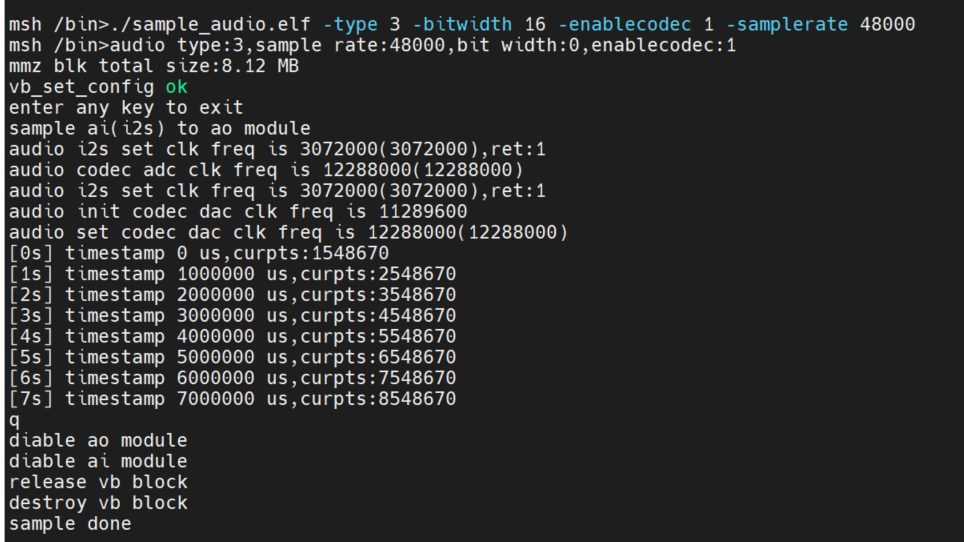
input./sample_audio.elf -type 3 -bitwidth 32, real-time test of audio input and output functions through API interface.
Test the overall functionality of audio input and output by calling the API interface:kd_mpi_ai_get_frame Obtain audio data and call kd_mpi_ao_send_frameoutput audio data.The user can press any key to exit the feature test.During the test, the timestamp information collected by AI is output in real time.
2.5.4.2.5 System binding test for I2S audio input and output modules#
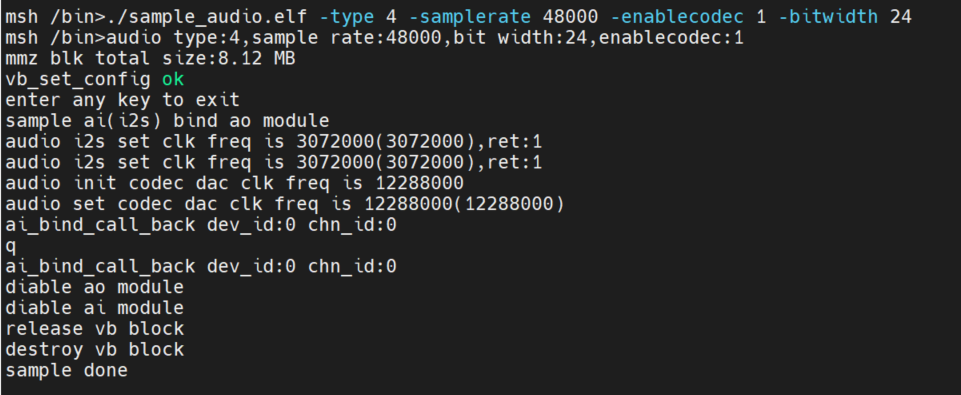
Input./sample_audio.elf -type 4, real-time test of audio input and output functions through AI and AO module binding.
By calling the system binding API interface: kd_mpi_sys_bindbind the AI and AO modules to test the overall function of audio input and output.The user can press any key to exit the feature test.
2.5.4.2.6 PDM audio input, I2S output API interface test#
input./sample_audio.elf -type 5 -bitwidth 32, real-time test of audio input and output functions through API interface.
Test the overall functionality of audio input and output by calling the API interface: kd_mpi_ai_get_frame get audio data and call kd_mpi_ao_send_frameoutput audio data.The user can press any key to exit the feature test.During the test, the timestamp information collected by AI is output in real time.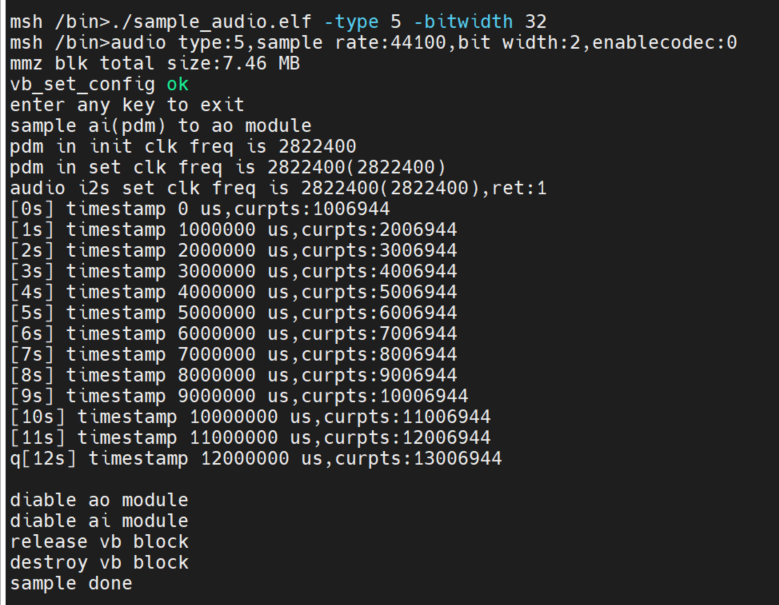
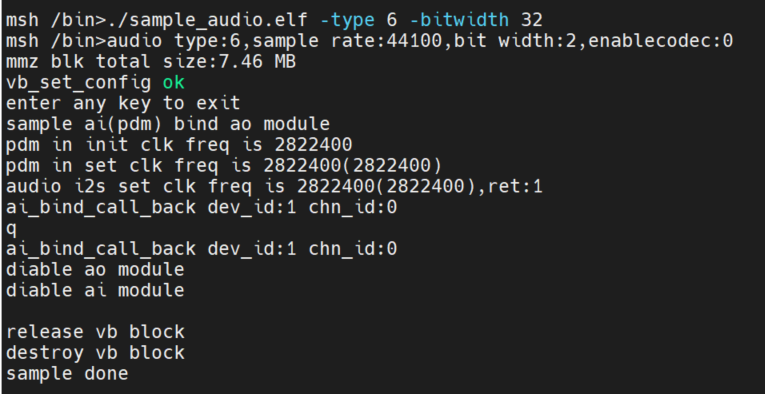
2.5.4.2.7 PDM audio input, I2S output system binding test#
Input./sample_audio.elf -type 6 -bitwidth 32, real-time test of audio input and output functions through AI and AO module binding.
By calling the system binding API interface: kd_mpi_sys_bindbind the AI and AO modules to test the overall function of audio input and output.The user can press any key to exit the feature test.
2.5.4.2.8 Coding Tests#
Get AI data and encode it and save it to a file. The codec only supports G711A/U, 16bit.
System binding method:./sample_audio.elf -type 7 -bitwidth 16 -enablecodec 1 -filename /sharefs/i2s_codec.g711a

API interface mode:./sample_audio.elf -type 9 -bitwidth 16 -enablecodec 1 -filename /sharefs/i2s_codec.g711a

2.5.4.2.9 Decoding test#
Read file data and decode playback. The codec only supports G711A/U, 16bit.
System binding method:./sample_audio.elf -type 8 -filename /sharefs/gyz.g711a -enablecodec 1 -bitwidth 16

API interface mode:./sample_audio.elf -type 10 -filename /sharefs/gyz.g711a -enablecodec 1 -bitwidth 16

2.5.4.2.10 Audio full-process test#
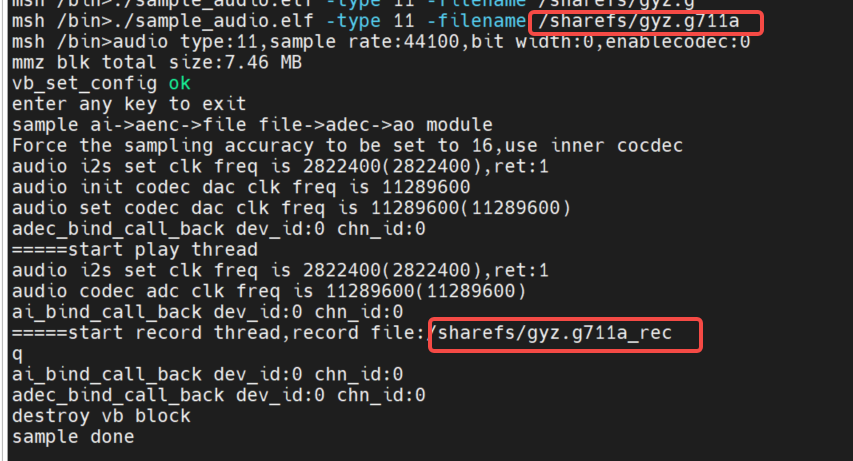
The recording module ai->aenc->file and the playback module file->adec->ao two links run at the same time, simulating the scene of voice intercom. Using the built-in codec, 16-bit precision to simulate.
-filenameto select the file to be played, for G711A format, select-sampleratethe sampling accuracy. Recording file name: +: if -_recfilename is -filename/sharefs/test.g711a, the recording file name is:/sharefs/test.g711a_rec
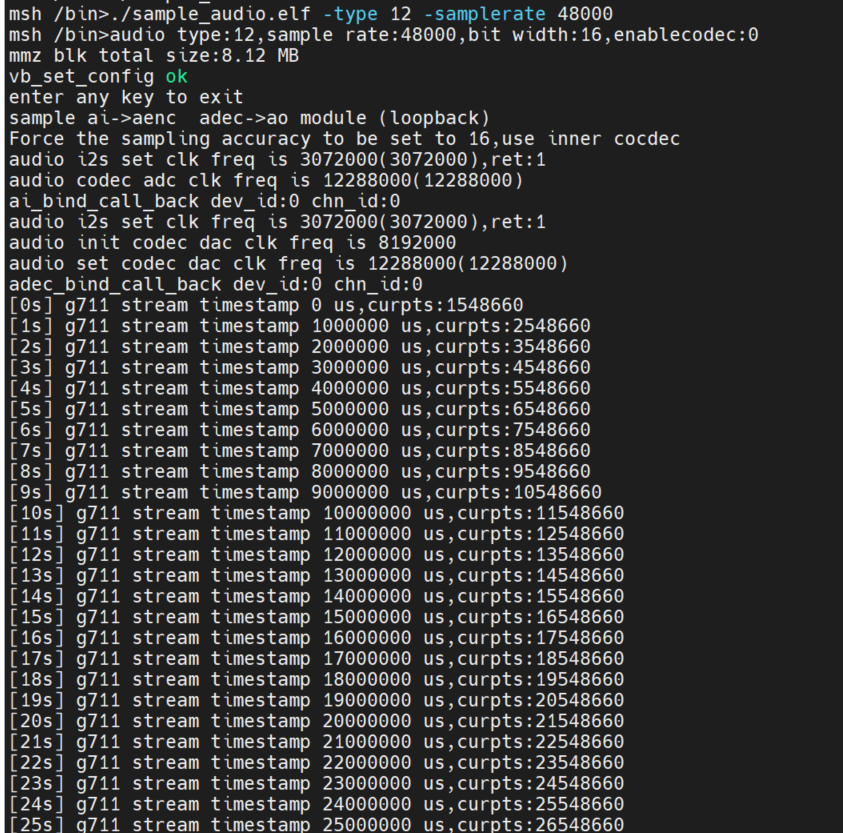
2.AI->AENC, ADC->AO two links are bound loopback test. Using the built-in codec, 16-bit precision to simulate.
Also test the G711 encoded stream timestamp.
Entercat /proc/umap/sysbind to view the inter-module system bindings.

2.5.4.2.11 MAPI Audio Test#
Ensure that the internuclear communication process is started: Execute on the big core:/bin/sample_sys_init.elf &
Make sure the little core is loaded with the intercore communication driver module:insmod /mnt/k_ipcm.ko
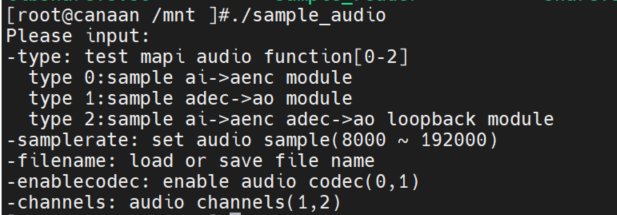
You can enter
/mnt/sample_audio -helphow to view the demo.-typeoption to test different module functionality.-samplerateoption to configure audio input and output with different sample rates (8K-192K), default is 44.1K.-enablecodecUse the built-in codec or off-chip audio daughter board, and use the built-in codec by default.-filenameLoad or store the G711 file name.-channels: Specifies the number of channels. 8
AI->AENC test
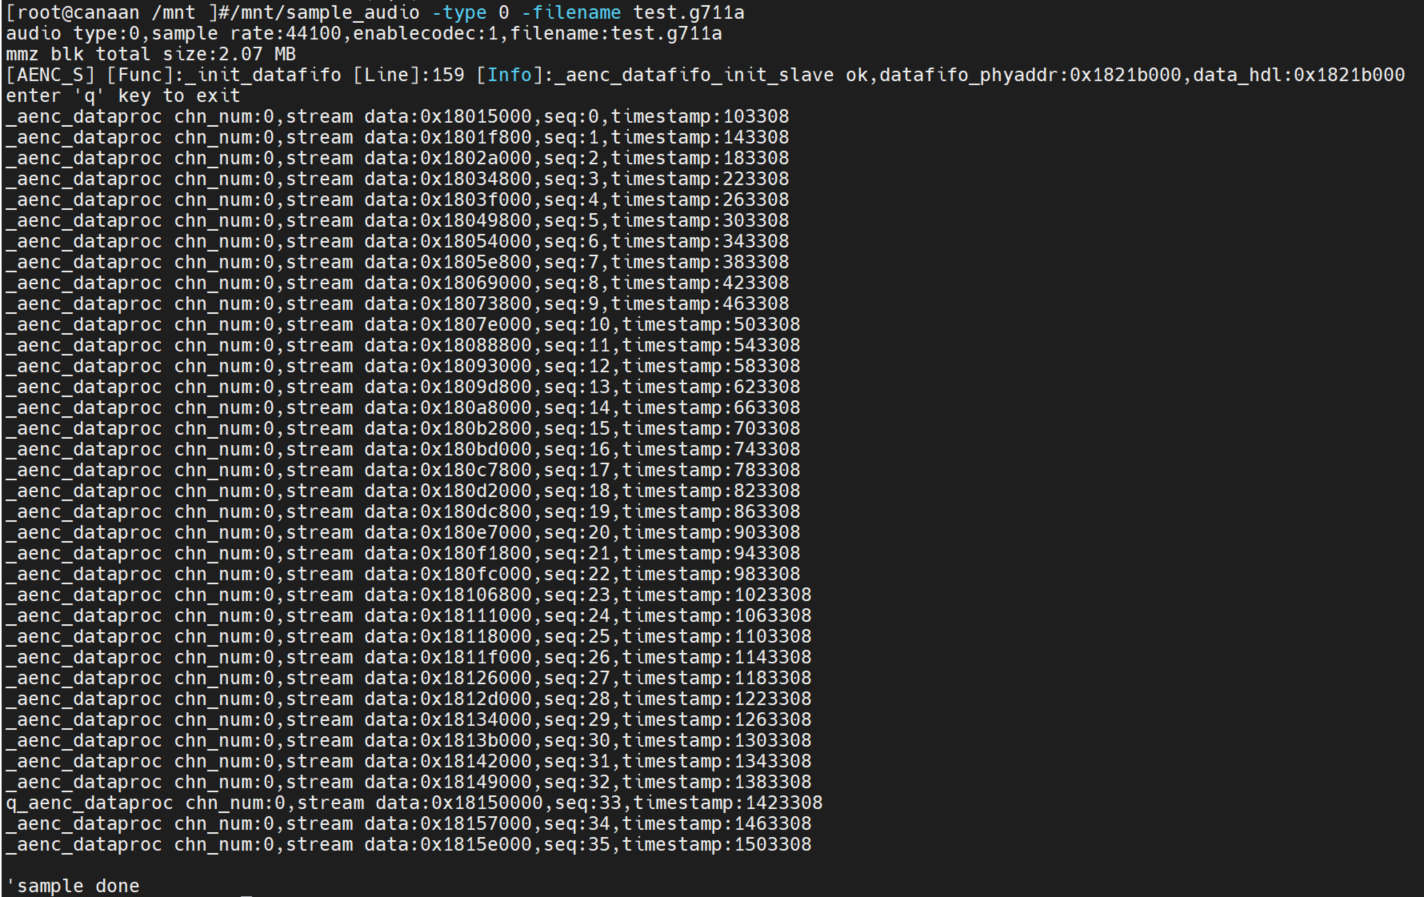
Execute command on the little core: /mnt/sample_audio -type 0 -filename test.g711aPress the q key to exit the test. The demo captures audio data in real time and encodes it into G711A format and saves it to a file.
ADEC->AO test
Execute command on the little core: /mnt/sample_audio -type 1 -filename tes.g711aPress the q key to exit the test. The demo can loop decoding and play files in the local G711A format.

AI->aenc adec->ao loopback test
Run the command on the little core: /mnt/sample_audio -type 2 , press the q key to exit the test. The demo can collect audio data in real time and encode it into G711A format, and then decode the G711A format data and play the output.

2.6 Vicap_demo#
2.6.1 Introduction to vicap_demo#
VICAP Demo implements the camera data acquisition preview function by calling the MPI interface.
2.6.2 Feature description#
The current version supports image acquisition preview of OV9732, OV9286, and imx335 camera modules, and supports up to three data streams and up to three camera data inputs.
2.6.3 Dependent Resources#
Camera module
2.6.4 Instructions for Use#
2.6.4.1 Compilation#
For a detailed description of the software compilation environment, refer to the SDKREADME.md.
Executed in the k230_sdk directory, the
make mpp-clean && rt-smart && make build-imagemodification of the big core is compiled into the SD card image, and the imagek230_sdk/output/k230_evb_defconfig/images/file will be generated under the directorysysimage-sdcard.img.
2.6.4.2 Execution#
Copy the
src/big/mpp/userapps/sample/elf/sample_vicap.elffile to the directory specified locallyMount this directory to the little core Linux via nfs
/sharefsOn the large kernel end, enter via
cd /sharefsthe command/sharefsExecute commands in this directory
./sample_vicapto obtain command help information
When you enter the : sample_vicapcommand, print the following prompt:
usage: ./sample_vicap -mode 0 -dev 0 -sensor 0 -chn 0 -chn 1 -ow 640 -oh 480 -preview 1 -rotation 1
Options:
 -mode:         vicap work mode[0: online mode, 1: offline mode. only offline mode support multiple sensor input]     default 0
 -dev:          vicap device id[0,1,2]        default 0
 -dw:           enable dewarp[0,1]    default 0
 -sensor:       sensor type[0: ov9732@1280x720, 1: ov9286_ir@1280x720], 2: ov9286_speckle@1280x720]
 -ae:           ae status[0: disable AE, 1: enable AE]        default enable
 -awb:          awb status[0: disable AWB, 1: enable AWb]     default enable
 -chn:          vicap output channel id[0,1,2]        default 0
 -ow:           the output image width, default same with input width
 -oh:           the output image height, default same with input height
 -ox:           the output image start position of x
 -oy:           the output image start position of y
 -crop:         crop enable[0: disable, 1: enable]
 -ofmt:         the output pixel format[0: yuv, 1: rgb888, 2: rgb888p, 3: raw], only channel 0 support raw data, default yuv
 -preview:      the output preview enable[0: disable, 1: enable], only support 2 output channel preview
 -rotation:     display rotaion[0: degree 0, 1: degree 90, 2: degree 270, 3: degree 180, 4: unsupport rotaion]
 -help:         print this help
The parameters are described as follows:
Parameter name |
Optional parameter value |
Parameter description |
|---|---|---|
-Dev |
0: vicap device 0 1: vicap device 1 2: vicap device 2. |
Specify the currently used vicap device, and the system supports up to three vicap devices. By specifying the device number, the binding relationship between the sensor and different vicap devices is realized. For example: -dev 1 -sensor 0 binds the ov9732 1280x720 RGB image output to vicap device 1. |
-mode |
0: Online mode; 1: Offline mode |
Specify the vicap device working mode, current before online mode and offline mode. For multiple sensor inputs, it must be specified as offline mode. |
-sensor |
0: ov9732@1280x720, 1: ov9286_ir@1280x720, 2: ov9286_speckle@1280x720, 3: imx335_2lan@1920x1080, 4:imx335_2lan@2592x1944, 5: imx335_4lan@2592x1944 |
Specify the sensor type currently used, the current system supports three types of image output: ov9732 1280x720 RGB image output, ov9286 1280x720 infrared image output, ov9286 1280x720 speckle image output. The IMX335 outputs an RGB image |
-Chn |
0: vicap device output channel 0 1: vicap device output channel 1 2: vicap device output channel 2. |
Specify the output channel of the currently used vicap device, one vicap device supports up to three outputs, and only channel 0 supports RAW image format output |
-ow |
Specifies the output image width, which defaults to the input image width. The width needs to be 16 bytes aligned. If the default width exceeds the maximum width of the display output, the display output width is used as the final output width of the image If the output width is smaller than the input image width and the ox or oy parameters are not specified, the default is the scaled output |
|
-oh |
Specifies the output image height, which defaults to the input image height. If the default height exceeds the maximum height of the display output, the display output height is used as the final output height of the image If the output height is less than the input image height and the ox or oy parameter is not specified, the default is the scaled output |
|
-ox |
Specifies the horizontal start position of the image output, this parameter greater than 0 will perform the output cropping operation |
|
-Limited liability company |
Specifies the vertical start position of the image output, this parameter greater than 0 will perform the output cropping operation |
|
-crop |
0: Disable the cropping function 1: Enable the cropping function |
When the output image size is smaller than the input image size, the output is not scaled by default, or clipped if the flag is specified |
-ofmt |
0:YUV format output 1:RGB format output 2:RAW format output |
Specify the output image format, the default is YUV output. |
-preview |
0: Disable preview display 1: Enable preview display |
Specifies the output image preview display function. The default is enabled. Currently, up to 2 output images can be previewed at the same time. |
-rotation |
0: Rotate 0 degrees 1: Rotate 90 degrees 2: Rotate 180 degrees 3: Rotate 270 degrees 4: Rotation is not supported |
Specifies the rotation angle of the preview display window. By default, only the first output image window supports the rotation function. |
Example 1:
./sample_vicap -dev 0 -sensor 0 -chn 0 -chn 1 -ow 640 -oh 480
Note: Bind the ov9732@1280x720 RGB to vicap device 0 and enable vicap device output channel 0 and channel 1, where channel 0 output size defaults to the input image size (1280x720) and channel 1 output image size is 640x480
Example 2:
./sample_vicap.elf -mode 1 -dev 0 -sensor 0 -chn 0 -ow 1080 -oh 720 -dev 1 -sensor 1 -chn 0 -ow 1080 -oh 720 -dev 2 -sensor 2 -chn 0 -ow 1080 -oh 720 -preview 0
Note: Three inputs and outputs. Bind the ov9732@1280x720 RGB to vicap device 0 and set channel 0 to output an image with a size of 1080x720; bind ov9286@1280x720 infrared to vicap device 1 and set channel 0 to output an image with a size of 1080x720; bind ov9286@1280x720 speckle to vicap device 2 and set channel 0 to output an image with a size of 1080x720 (no preview);
2.7 DMA_demo#
2.7.1 Introduction to DMA_demo#
2.7.1.1 Unbound mode#
DMA channels 0-3 are GDMA and 4-7 are SDMA.
Channel 0 continuous input image with 1920x1080 resolution, 8bit, YUV400, single channel mode, output after rotation 90 degrees, and golden data comparison
Channel 1 continuous input image with 1280x720 resolution, 8bit, YUV420, dual-channel mode, output after rotation 180 degrees, and golden data comparison
Channel 2 continuous input image with resolution of 1280x720, 10bit, YUV420, triple channel mode, x-mirror, y-mirror post output, and golden data comparison
Channel 4 loops a piece of data in 1D mode, and compares it with the golden data after the transfer is completed
Channel 5 loops a piece of data in 2D mode, and compares it with the golden data after the transfer is completed
2.7.1.2 Binding mode#
Using VVI as the DMA analog input, channel 0 of VVI device 0 is bound to channel 0 of DMA, and channel 1 of VVI device 0 is bound to channel 1 of DMA. Every other second, vvi enters an image of 640x320, YUV400, 8bit, rotated 90°, and 640x320, YUV400, 8bit, rotated 180° to channel 1.
2.7.2 Feature description#
Including DMA device property configuration, channel property configuration, graphics input, output, release, pipeline binding and other functions.
2.7.3 Dependent Resources#
not
2.7.4 Instructions for Use#
2.7.4.1 Compilation#
Software compilation refers to the README.md in the release SDK package.
2.7.4.2 Execution#
Unbound mode demo runs
/bin/sample_dma.elf
The test information will be displayed on the screen, enter e to end the run.
The bound mode demo runs
/bin/sample_dma_bind.elf
A test message will be displayed on the screen, enter q to finish the run.
2.8 DPU_demo#
2.8.1 Introduction to dpu_demo#
2.8.1.1 Unbound mode#
Parse parameters from the configuration file and configure the device and channel properties of the DPU, read and configure the reference map and template map from the specified path, cycle through the input of infrared map and speckle map, obtain the result, and detect whether the calculation is correct.
2.8.1.2 Binding mode#
Parse parameters from the configuration file and configure the device properties and channel properties of the DPU, read and configure the reference map and template map from the specified path, use VVI as the simulation prestage for pipeline binding, input the infrared map and speckle map, DPU calculate the result, obtain the result in user mode and save the depth map in the form of a file (you can use the corresponding software to open the depth map), press q to exit the program.
2.8.2 Feature description#
Including configuration file resolution, device and channel attribute configuration, device and channel startup pause, user-mode input data, output results, release results, pipeline bound input and output.
2.8.3 Dependent Resources#
not
2.8.4 Instructions for Use#
2.8.4.1 Compilation#
For the software compilation environment, refer to the README.md in the SDK. Since this module requires dependent files, the following steps need to be performed at compile time:
2.8.4.2 Execution#
The configuration file required for demo and the golden data of input and output are stored in
k230_sdk/test_resource/dputhe directory , and the entire folder can bedpucopied to the directory for convenience/sharefs/(pleasesharefsrefer to the corresponding document for use), and a directory will exist in the big core after/sharefs/dpu/copying.Copy
k230_sdk/src/big/mpp/userapps/sample/elf/sample_dpu.elfto/sharefs/a directory.Unbound mode demo runs
/sharefs/sample_dpu.elf /sharefs/dpu/The test information will be displayed on the screen and will end after 10 frames of running. In the above command, the parameters
/sharefs/dpu/can be set according to the path where the user profile is actually stored.The bound mode demo runs
/sharefs/sample_dpu.elf /sharefs/dpu/ BOUNDA test message will be displayed on the screen, enter q to finish the run. In the above command, the parameters
/sharefs/dpu/can be set according to the path where the user profile is actually stored.
2.9 UVC_demo#
2.9.1 Introduction to uvc_demo#
The uvc demo uses the K230 development board as a USB camera, the USB cable is connected to the PC, and the PC player can play the image of the real camera.
2.9.2 Feature description#
The current version supports bulk transport and ISO transfer.
The current version only supports images in 640x480 NV12 format and 1280x720 H264/MJPEG images.
Support PID, VID, and device name configuration by modifying shell scripts.
2.9.3 Dependent Resources#
Camera module, OV9732/IMX335 camera.
The type c cable connects USB0 to a PC
PC camera app or install PotPlayer software
2.9.4 Instructions for Use#
2.9.4.1 Compilation#
For the software compilation environment, refer to the README.md in the SDK.
The source code of the little core user program is located at
cdk/user/mapi/sample/cameraThe little core driver is located at
linux/drivers/usb/dwc2The little core driver is located at
linux/drivers/usb/gadgetThe big core program involves MPP repositories as well as CDKs
The large-core RTT implements the camera driver function.
The small-core Linux implements the USB driver function and obtains camera images from the big core through mapi.
Refer to K230_USB Application Practice_UVC Transmitting YUV and Encoding Streams
2.9.4.2 Execution#
After entering the big core rt-smart system, enter the /bin directory and execute
msh /sharefs/app>./sample_sys_init.elf
After entering the little core Linux system, enter the/mnt directory and execute
./canaan-camera.sh start otg0

./camera
Typec USB cable connects USB0 with PC, potplayer player playback camera.
By default, the BULK transport is used, and the following command can be used to change to ISO transport.
./canaan-camera.sh stop

./canaan-camera.sh start otg0 iso

./camera -i
The default is the IMX335 camera. If it is an OV9732 camera, use,./camera -t 0 other cameras have not been tested.
Enter the PotPlayer 选项 -> -> -> 设备 摄像头 interface,
视频录制设备->设备, select ->UVC Camera, select视频录制设备``格式
H264 1280*720 30(P 16:9)or MJPG 1280*720 30(P 16:9)orNV12 640*360p 30(P 16:9)
PotPlayer -> 打开 -> 摄像头/其他设备
2.10 USB_demo#
2.10.1 Introduction to USB_demo#
USB demo currently debugs 4 functions,
Since the upgrade function of K230 can only use USB0, USB0 is used as a device, simulating a U disk, and simulating a mouse and keyboard. The jumper cap cannot be connected to pin 1/pin 2 of J5, and cannot be powered by 5V as a device.
As host, connect a USB flash drive and connect a mouse and keyboard. A jumper cap is required to connect pin 3/pin 4 of J5 to enable 5V power supply.
2.10.2 Feature description#
The functionality of the USB demo is the original integration of Linux systems.
2.10.3 Dependent Resources#
typeC line, typeC to typeA.
2.10.4 Instructions for Use#
2.10.4.1 Simulate a USB flash drive as a device#
#Plan a memory space as disk space to simulate a USB flash drive.
[root@canaan / ]#gadget-storage-mem.sh
2+0 records in
2+0 records out
mkfs.fat 4.1 (2017-01-24)
[ 1218.882053] Mass Storage Function, version: 2009/09/11
[ 1218.887308] LUN: removable file: (no medium)
[ 1218.895464] dwc2 91500000.usb-otg: bound driver configfs-gadget
[root@canaan / ]#[ 1219.019554] dwc2 91500000.usb-otg: new device is high-speed
[ 1219.056629] dwc2 91500000.usb-otg: new address 5

#Use the FAT partition of SD/eMMC as disk space to simulate a USB flash drive.
[root@canaan ~ ]#gadget-storage.sh
[  359.995510] Mass Storage Function, version: 2009/09/11
[  360.000762] LUN: removable file: (no medium)
[  360.013138] dwc2 91500000.usb-otg: bound driver configfs-gadget
[root@canaan ~ ]#[  360.136809] dwc2 91500000.usb-otg: new device is high-speed
[  360.173543] dwc2 91500000.usb-otg: new address 43
Connect the USB0 of the development board, typeC is connected to the PC, and the USB flash drive is displayed on the PC.
2.10.4.2 Connect the USB flash drive as HOST#
The K230 development board USB1 is connected to the U disk through typeC to typeA.
2.10.4.3 Emulates a mouse and keyboard as a device#
The K230 development board USB0 is connected to another computer device by typeC for testing
[root@canaan / ]#gadget-hid.sh

[root@canaan / ]#hid_gadget_test /dev/hidg0 mouse
#Enter the corresponding operations according to the prompts, such as -123 -123, and you can see the mouse pointer on the PC move.

[root@canaan / ]#hid_gadget_test /dev/hidg1 keyboard
#Enter the corresponding operations according to the prompts, and you can see similar keyboard input on the PC. For example a b c --return
2.10.4.4 Connect a mouse and keyboard as a HOST#
The K230 development board USB1 connects a mouse or keyboard to typeC to typeA.
#Use the following command to determine the event corresponding to the input device.
[root@canaan ~ ]#cat /proc/bus/input/devices
...
I: Bus=0003 Vendor=046d Product=c52f Version=0111
N: Name="Logitech USB Receiver"
P: Phys=usb-91500000.usb-otg-1/input0
S: Sysfs=/devices/platform/soc/91500000.usb-otg/usb1/1-1/1-1:1.0/0003:046D:C52F.0001/input/input2
U: Uniq=
H: Handlers=event2
B: PROP=0
B: EV=17
B: KEY=ffff0000 0 0 0 0
B: REL=1943
B: MSC=10
[root@canaan / ]$ test_mouse /dev/input/event2
#Click or move the mouse, and the serial port will display the corresponding display.

[root@canaan / ]$ test_keyboard /dev/input/event2
#Press different keys on the keyboard, and the serial port will have corresponding displays.
2.11 GPU_demo#
2.11.1 Introduction to GPU_demo#
The GPU demo contains a total of three executable programs
tiger: Example of drawing a vector drawing of a tigerlinearGrad: Draw a linear gradient exampleimgIndex: Draw a color lookup table
2.11.2 Feature description#
GPU demo mainly covers the three functions of GPU vector drawing, linear gradient (achieved through pattern), and color lookup table.
2.11.3 Dependent Resources#
The file system is writable.
2.11.4 Instructions for Use#
Go to a writable directory and execute the program
2.11.4.1 tiger#
Run the tigercommand and generate a tiger .png in the current directory after execution, as shown in the following figure

2.11.4.2 linear degrees#
Run the linearGradcommand and generate a linearGrad .png in the current directory after execution, as shown in the following figure

2.11.4.3 imgIndex#
Run the imgIndexcommand and generate four image files in the current directory, as shown in the following figure
imgIndex1.png: index1 mode, supports 2 colors

imgIndex2.png: index2 mode, supports 4 colors

imgIndex4.png: index4 mode, supports 16 colors

imgIndex8.png: index8 mode, supports 256 colors

2.11.4.4 vglite_drm#
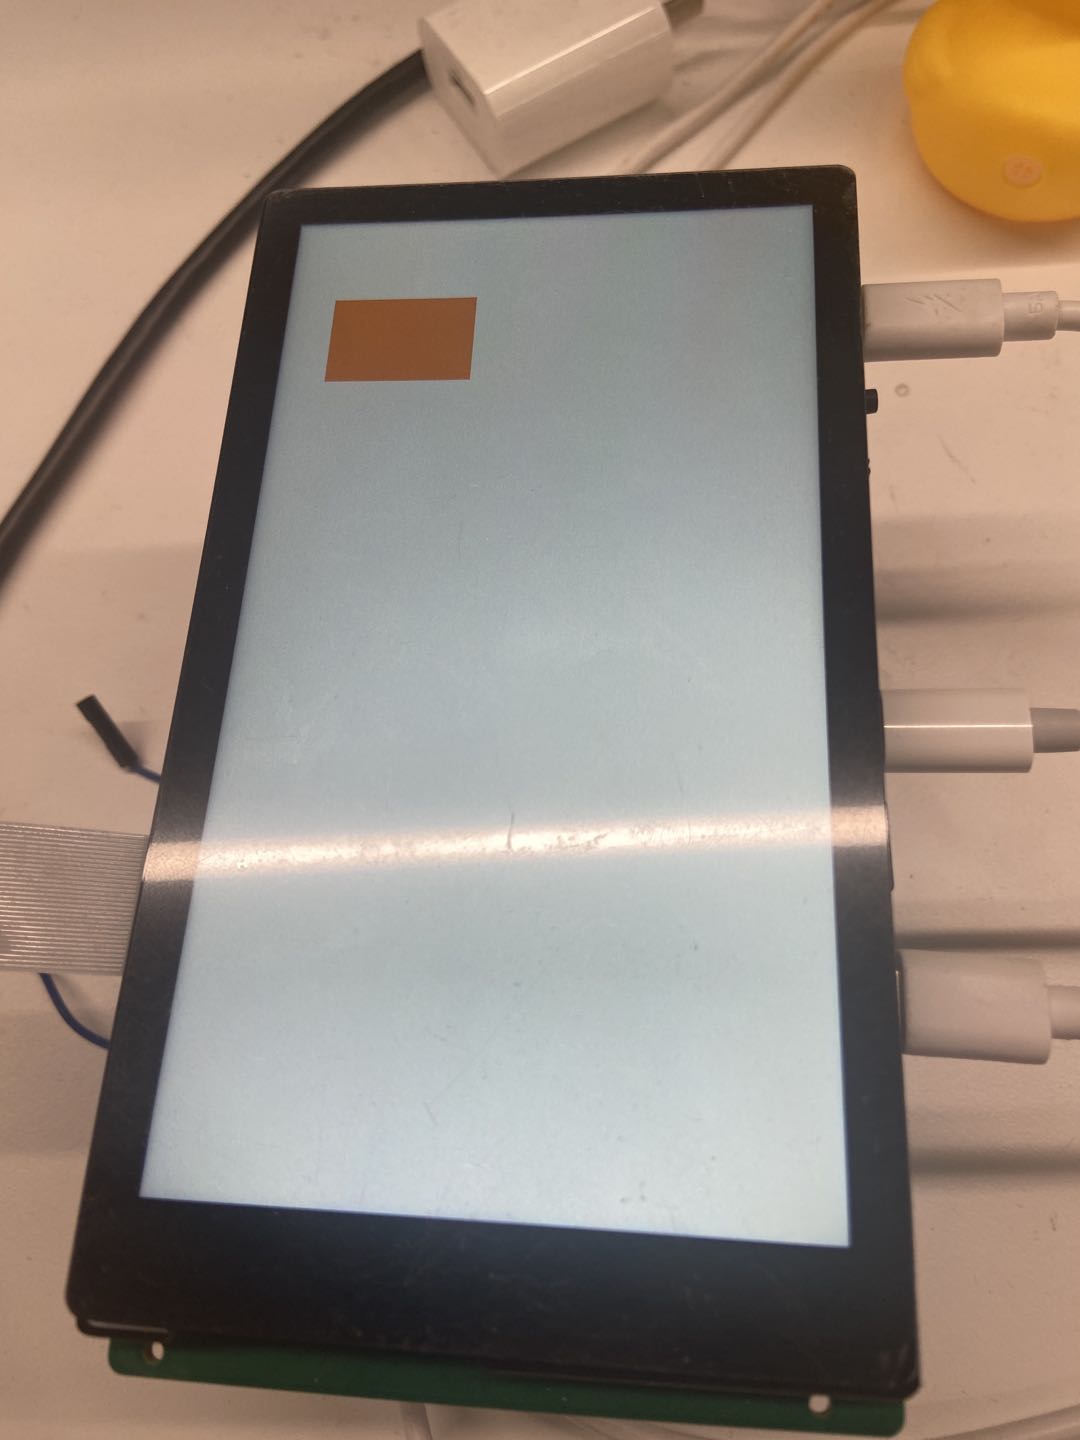
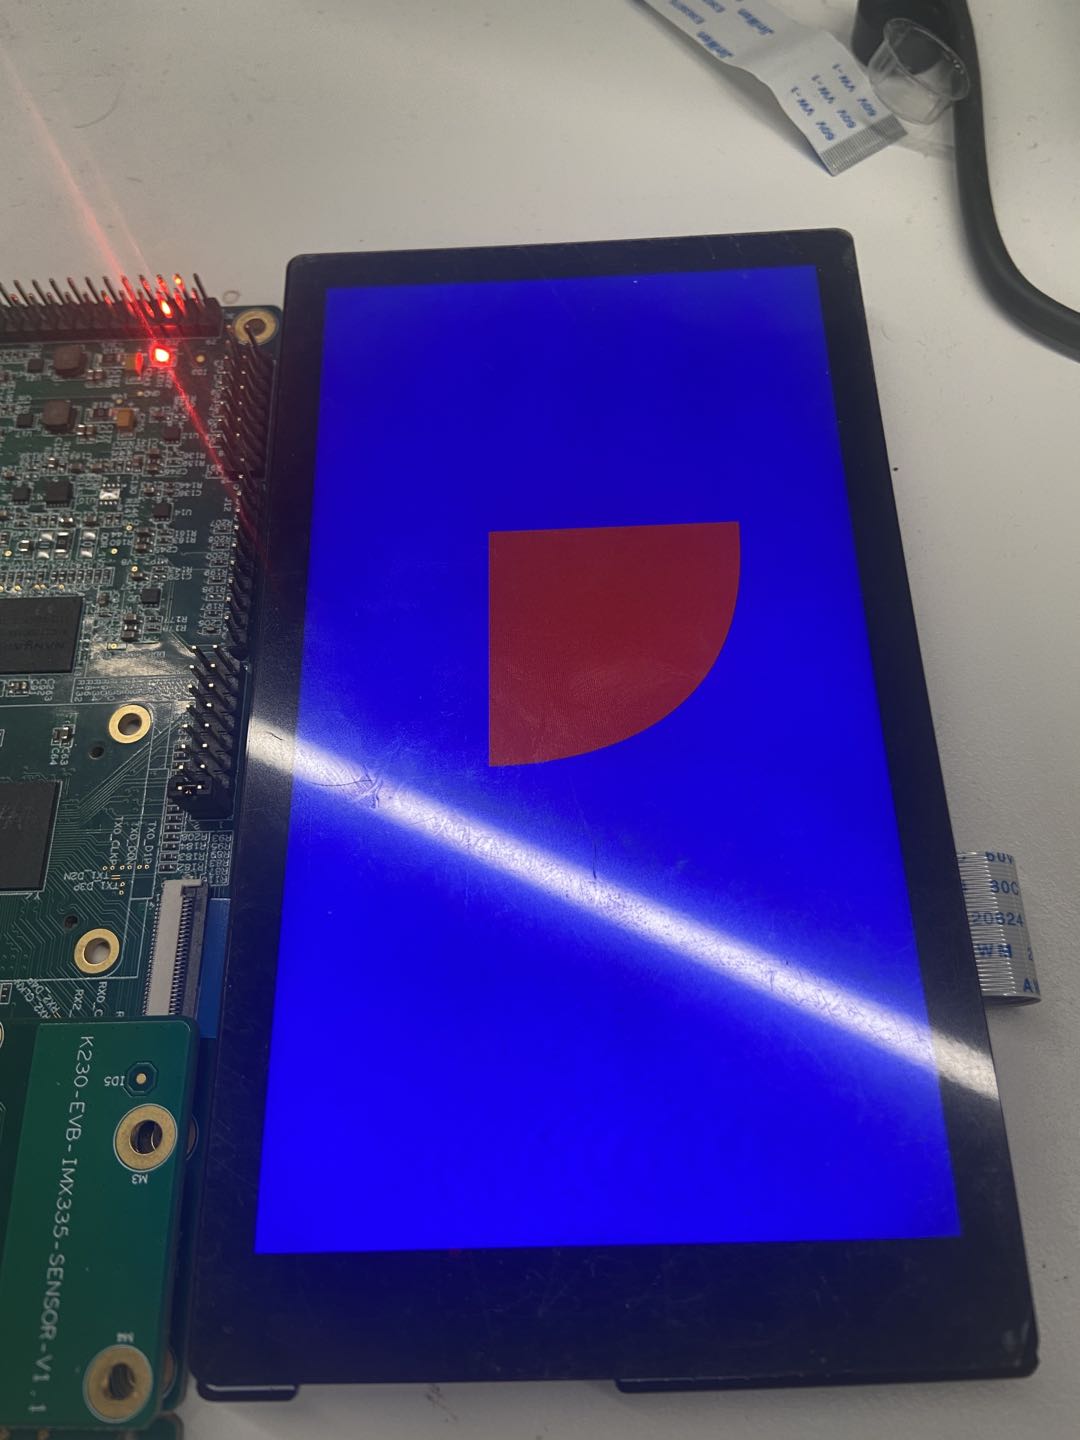
Run the vglite_drmcommand, which displays the pattern drawn by the GPU on the LCD screen, and pressEnter the key again to display the next pattern, as shown in the figure
2.11.4.5 vglite_cube#
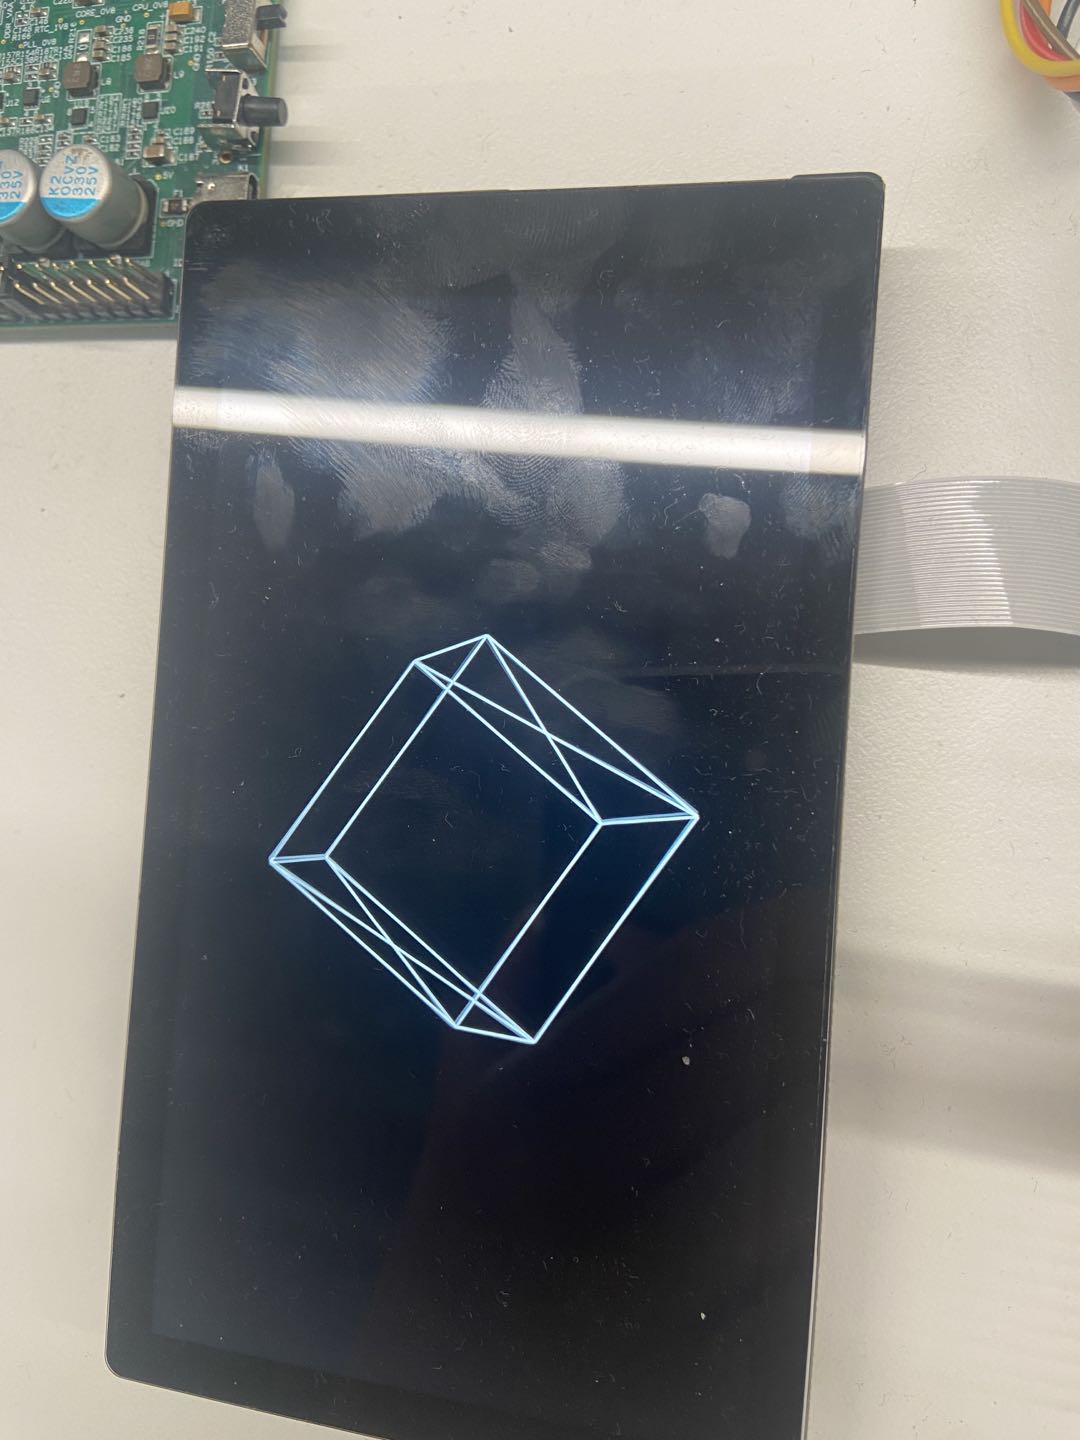
Run the vglite_cubecommand and a rotating cube drawn by the GPU will be displayed on the LCD screen, as shown in the following figure
This demo runtime kernel will have a large number of print messages, if you do not want these messages to be displayed, you can reduce the kernel print level
sysctl -w kernel.printk=6
2.12 DRM display demo#
2.12.1 Introduction to using demo#
The demo runs on a K230 small-core Linux system and displays the image on the screen.
2.12.2 Features Description#
DRM supports 5 layer operations, including: 1 video layer and 4 OSD layers;
The video layer supports NV12, NV21, NV16, NV61 color spaces
The OSD layer supports ARGB8888, ARGB4444, RGB888, RGB565 color spaces
2.12.3 Dependent Resources#
LCD screen
2.12.4 Instructions for Use#
2.12.4.1 Compilation#
Software compilation refers to the README.md in the release SDK package
2.12.4.2 Execution#
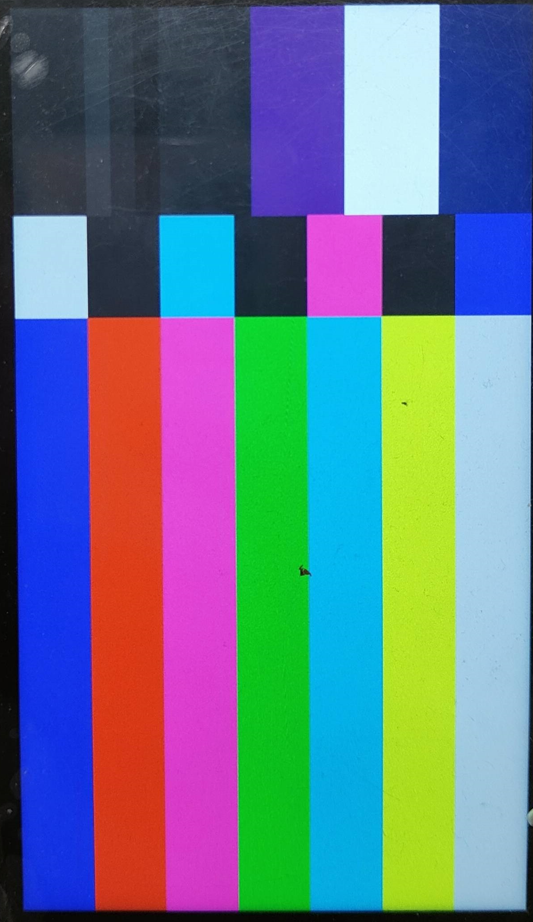
modetest -M canaan-drm -D 0 -a -s 38@36:1080x1920-30 -P 31@36:1080x1920@NV12 -v -F smpte
After executing the above command, a color bar will be displayed on the LCD screen, as follows:
2.13 LVGL demo#
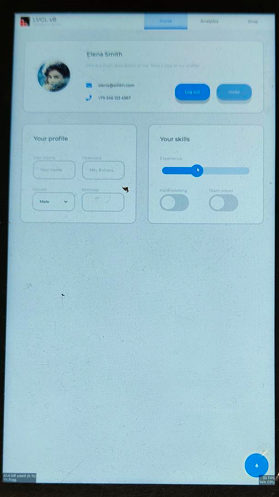
2.13.1 Introduction to using demo#
The demo runs on a K230 small-core Linux system and displays a configuration interface on the screen that supports touch operation.
2.13.3 Dependent Resources#
LCD screen
2.13.2 Features description#
Support button, slider function
Support touch function
2.13.4 Instructions for Use#
2.13.4.1 Compilation#
Software compilation refers to the README.md in the release SDK package
2.13.4.2 Execution#
lvgl_demo_widgets
After executing the above command, the configuration interface will be displayed on the LCD screen, and the relevant configuration can be made through the touch screen, as follows:
2.14 Rtsp push streaming Demo#
2.14.1 Introduction to Demo#
This demo implements RTSP streaming.
2.14.2 Feature description#
The demo supports simultaneous push of audio and video streams to RTSP Server, which mapi venc&aencencodes audio and video through interfaces; after pushing, the demo supports three URL push and pull streams.
2.14.3 Dependent Resources#
A USB-to-ETH network port converter is required, and the development board is connected to the network cable
2.14.4 Instructions for Use#
2.14.4.1 Compilation#
Refer to the introduction in the Release SDK packageREADME.md, you can compile cdk-user in the docker environment, andk230_sdk/src/common/cdk/user/out/little generate the executable program rtsp_demo after the compilation is completed
2.14.4.2 Execution#
rtsp_demo the sensor type used by default is IMX335_MIPI_2LANE_RAW12_1920X1080_30FPS_LINEAR, the sensor type and other parameters can be modified by passing parameters from the command line, as follows:
After launching the board:
Use
lsmodto check whether the k_ipcm module is loaded on the little core side. If it is not loaded, executeinsmod k_ipcm.koto load the k_ipcm module.Start the internuclear communication process on the large nuclear side, execute
./sample_sys_inif.elfIn the little core side/mnt directory, execute, the
./rtsp_demodefault is 1-channel H265 video encoding push, the resolution is 1280x720, if you need to refer to the following parameter description, when pushing the MJPEG code stream, the resolution currently supports a maximum of 2032x1944, and the minimum resolution is 640x480
Usage: ./rtsp_demo -s 0 -n 2 -t h265 -w 1280 -h 720 -a 0
                    -s: the sensor type:
                        see vicap doc
                    -n: the session number, range: 1, 2,3
                    -t: the video encoder type: h264/h265/mjpeg
                    -w: the video encoder width
                    -h: the video encoder height
                    -a: audio input type(0:mic input  1:headphone input):default 0.
The sensor type value is described in the k230_docs/en/01_software/board/mpp/K230_Camera_Sensor_Adaptation_Guide.mdk_vicap_sensor_type in the document
Audio input type selectable: onboard MIC or headphone input.
After the rtsp_demo on the little core runs normally, the URL address of the form will be printed, rtsp://ip:8554/session0 where 0 represents the 0th way, which can be played through the stream of VLC pulling URLs; if you need to stop running, please stop VLC pulling the stream first, and then execute thectrl+c Stop Running rtsp_demo.
2.15 FaceAe Demo#
2.15.1 Demo introduction#
This demo is used in the big core, which is a demo of VICAP, KPU, VO (video output), and AERoi joint debugging, and can appropriately adjust the face exposure brightness through the face detection interface.
2.15.2 Compilation#
First refer to the README.md in the release SDK package and compile the image using Docker.
After the compilation is complete, the sample (sample_face_ae.elf) is stored in this path by default
k230_sdk/src/big/mpp/userapps/sample/elfSince KPU linkage requires the use of the detection model test.kmodel, the path is stored after compilation
k230_sdk/src/big/mpp/userapps/sample/elf
2.15.3 Execution#
Start the development board, enter the little core/mnt, add the intercore communication module, start the intercore communication, create a shared file system, and share the shared file systemsample_face_ae.elf test.kmodelwith the little core to the big core for execution. The way to put files into the little core file system can be transferred by mounting, TFTP, etc. The current default file is already stored in the little core ~ directory.
cd /mnt
insmod k_ipcm.ko
mkdir /sharefs
cp ~/sample_face_ae.elf /sharefs/
cp test.kmodel /sharefs/
./sharefs &
After the little core starts sharefs, the big core shared file system gets sample and kmodel
cd /sharefs
./sample_face_ae.elf test.kmodel 1 # arg1: Model name, arg2: enable face ae

Wait for the initialization to complete and prompt any letter + enter,
for example:Type a, press Enter, and run face ae demo
After successful execution, the physical address of each frame of image will be printed.
2.16 DPU_Vicap_demo#
2.16.1 Introduction to demo#
The demo process is as follows:
Start vicap;
dump a frame of speckle in user mode;
Send the speckle map obtained from VICAP to DMA for 90-degree rotation;
Acquire the image after DMA rotation in user mode;
Send the DMA rotated image to the DPU for deep processing;
Depth map after DPU processing acquired in user mode;
Save as a file to the big and little core shared directory
/sharefs, which can be sharedmntto the server and view the depth map using tools.
2.16.2 Feature description#
ISP captures images, DMA rotates images, and DPUs do depth processing.
2.16.3 Dependent Resources#
Calibration files, including configuration files and reference drawing files, are required. Configuration files and reference diagram files need to be paired with the sensor. The path ofk230_sdk/test_resource/dpu the configuration file and reference image file is in the directory, and the configuration file and reference image file correspond only to sensor1.
2.16.4 Instructions for Use#
2.16.4.1 Compilation#
Place the configuration file and reference image file in the
k230_sdk/src/big/rt-smart/userapps/root/bin/dpudirectory, as shown in the following figure:
Execute the
k230_sdkcompile command under the directorymakeAfter the compilation is completed, there
k230_sdk/src/big/mpp/userapps/sample/elfwill be a demo file in the directorysample_dpu_vicap.elf. Therek230_sdk/output/k230_evb_defconfig/imageswill be system image files in the directorysysimage-sdcard.img.
For a more detailed compilation process, refer to the README.md in the release SDK package.
2.16.4.2 Execution#
To mount nfs, use the following command:
ifconfig eth0 up
udhcpc
# Replace the following IP address and path with your own server’s IP address and path.
mount -t nfs 10.10.1.94:/home/user/nfs  /sharefs -o nolock
After successful mounting
/sharefs, the directories can be seen in both large and little cores, and the compiled demosample_dpu_vicap.elfis copied to the server’s nfs directory (here it is/home/user/nfs), and the corresponding elf file can also be seen under/sharefsthe big core rttUse the command
./sample_dpu_vicap.elf -dev 0 -sensor 2 -chn 0 -preview 1 -rotation 1to start demo, and the output printout information is as follows:
Input
d, output print information as follows: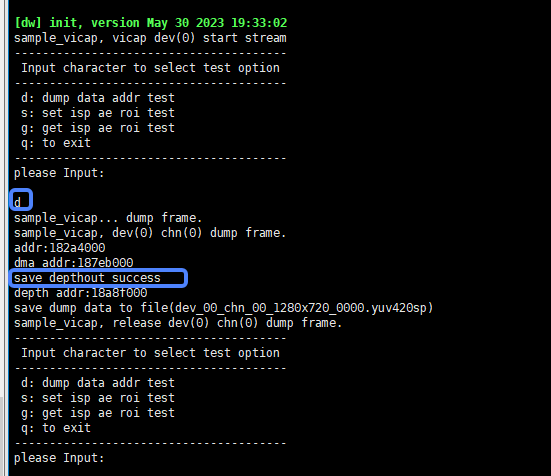
Enter
q, exit the program.At this time,
/sharefsthere is a file in the directory,depth_out.binwhich is the depth map file output by the DPU, which can be opened and viewed with the corresponding software.
2.16.4.3 The effect is as follows#
The actual scenario is as follows:
![real../../../../zh/01_software/board/examples/images/dpu_demo_real_02140401.jpg)
The speckle map taken by the sensor is as follows:
![Vicap../../../../zh/01_software/board/examples/images/dpu_demp_vicap_02140401.jpg)
The speckle chart after 90 degrees clockwise rotation of DMA is as follows:
![dma../../../../zh/01_software/board/examples/images/dpu_demo_dma_02140401.jpg)
The depth map output by the DPU is as follows:
![dpu../../../../zh/01_software/board/examples/images/dpu_demo_dpu_02140401.jpg)
2.17 VICAP_DMA_DPU_demo#
2.17.1 Introduction to demo#
The demo process is as follows:
Bind VICAP to DMA and DMA to DPU;
Start dpu, dma, vicap;
ISP sends the speckle map to DMA, DMA rotates 90 degrees to the DPU, and the DPU prints the depth map address on the screen after depth processing;
2.17.2 Feature description#
ISP captures images, DMA rotates images, and DPUs do depth processing.
2.17.3 Resource dependency#
Calibration files, including configuration files and reference drawing files, are required. Configuration files and reference diagram files need to be paired with the sensor. The path ofk230_sdk/test_resource/dpu the configuration file and reference image file is in the directory, and the configuration file and reference image file correspond only to sensor1.
2.17.4 Instructions for Use#
2.17.4.1 Compilation#
Place the configuration file and reference image file in
k230_sdk/src/big/rt-smart/userapps/root/bin/dputhe directory, as shown in the following figure:![conf_file../../../../zh/01_software/board/examples/images/demo_dpu_conf_ref_file_02140401.png)
Execute the
k230_sdkcompile command under the directorymakeAfter the compilation is completed, there
k230_sdk/src/big/mpp/userapps/sample/elfwill be a demo file in the directorysample_vdd_r.elf. Therek230_sdk/output/k230_evb_defconfig/imageswill be system image files in the directorysysimage-sdcard.img.
For a more detailed compilation process, refer to the README.md in the release SDK package.
2.17.4.2 Execution#
To mount nfs, use the following command:
ifconfig eth0 up
udhcpc
# Replace the following IP address and path with your own server’s IP address and path.
mount -t nfs 10.10.1.94:/home/user/nfs  /sharefs -o nolock
After successful mounting
/sharefs, the directories can be seen in both large and little cores, and the compiled demosample_vdd_r.elfis copied to the server’s nfs directory (here it is/home/user/nfs), and the corresponding elf file can also be seen under/sharefsthe big core rttUse the command
./sample_vdd_r.elfto start demo;Enter
qStop the demo from running and save the depth map as a file/sharefsbelow with the namedepthout.binThe depth map can be viewed using the appropriate software.
The effect is as follows:
![depth../../../../zh/01_software/board/examples/images/dpu_demo_bind_depth_02150402.png)
2.18 Voice Intercom Demo#
2.18.1 Introduction to Demo#
This demo is used to demonstrate the two-way transmission and processing of audio data (the current version implements some functions of voice intercom)
2.18.2 Feature description#
Voice intercom involves both ends, both ends can collect and encode in real time to send audio data to the peer, and can also receive audio data from the peer for decoding and output. The current implementation refers to ONVIF and extends the backchannel on the basis of the rtsp protocol to support sending audio data from client to server; the following uses server and client to refer to both ends of voice intercom.
The following features are currently implemented:
The audio stream format is G711 mu-Law;
The sever side realizes real-time audio acquisition, encoding and transmission, and receives audio data from the client through the backchannel for decoding and output; The receiving side does not implement a jitter buffer;
The client side realizes the reception, decoding and playback of the audio code stream, as well as real-time audio collection, G711 mu-Law encoding, and sends it to the server side through the backchannel; The receiving side does not implement the jitter buffer;
Only one-on-one intercom support (only support one-way backchannel);
Does not support echo cancellation and other processing (the device side needs audio output to the headphones, and cannot use an external speaker);
2.18.3 Dependent Resources#
Two K230 devices are required, and the development board is connected to the same LAN through the USB-to-ETH network port converter
2.18.4 Instructions for Use#
2.18.4.1 Compilation#
Refer to the introduction in the release SDK packageREADME.md, compile cdk-user in the docker environment, andk230_sdk/src/common/cdk/user/out/little generate the executable program rtsp_server under after compilation, backchannel_client
2.18.4.2 Description of rtsp_server parameters#
The parameter name |
description |
Parameter range |
Default value |
|---|---|---|---|
h |
Print command-line parameter information |
- |
- |
v |
Whether to create a video session |
- |
- |
t |
Encoding type |
h264、h265 |
h265 |
in |
Video encoding width |
|
1280 |
h |
Video encoding height |
|
720 |
b |
Video encoding bitrate |
- |
2000 |
a |
Voice change settings |
|
0 |
s |
Sensor type |
Check out the camera sensor documentation |
7 |
The sensor type looks at the k230_docs/en/01_software/board/mpp/K230_Camera_Sensor_Adaptation_Guide.mddescription of the k_vicap_sensor_type in the documentation
2.18.4.3 Execution#
For convenience, the board running the server is named board A, and the running client is named board B:
First board A runs rtsp_server, microphone input, headphone output;
Then board B runs backchannel_client, microphone input, headphone output;
Specific execution steps on board A:
After starting the board, enter the little core/mnt directory:
Execute on the little core:
insmod k_ipcm.koExecute on big cores:
cd /bin; ./sample_sys_init.elfExecute on the little core:
./rtsp_server(after running the rtsp_server, the URL address of the form : will be printedrtsp://<server_ip>:8554/BackChannelTest).
Specific execution steps on plate B:
After starting the board, enter the little core/mnt directory:
Execute on the little core:
insmod k_ipcm.koExecute on big cores:
cd /bin; ./sample_sys_init.elfExecute on small nuclei :
./backclient_test rtsp:<server_ip>:8554/BackChannelTest)
backclient_test execute the command description: ./backclient_test <rtsp_url> <out_type>where rtsp_url is the RTSP address and out_type is the VO output connect type, see the k230_docs/en/01_software/board/mpp/K230_video_output_API_reference.mddescription of the k_connector_type in , out_type the default setting is 0
2.19 Depth map display demo#
2.19.1 Introduction to Demo#
This demo is used to display a depth map of DPU processing on the screen.
2.19.2 Feature description#
Bind VICAP to DMA and DMA to DPU;
Start dpu, dma, vicap, vo;
ISP sends the speckle map to DMA, DMA rotates 90 degrees to the DPU, and the DPU is deeply processed;
Get depth results in user mode;
Send the depth map to VO for display.
2.19.3 Dependent Resources#
Calibration files, including configuration files and reference drawing files, are required. Configuration files and reference diagram files need to be paired with the sensor. The path ofk230_sdk/test_resource/dpu the configuration file and reference image file is in the directory, and the configuration file and reference image file correspond only to sensor1.
2.19.4 Instructions for Use#
2.19.4.1 Compilation#
Place the configuration file and reference diagram file in the
k230_sdk/src/big/rt-smart/userapps/root/bin/dpudirectory.Execute the
k230_sdkcompile command under the directorymakeAfter the compilation is completed, there
k230_sdk/src/big/mpp/userapps/sample/elfwill be a demo file in the directorysample_dpu_vo.elf. Therek230_sdk/output/k230_evb_defconfig/imageswill be system image files in the directorysysimage-sdcard.img.
For a more detailed compilation process, refer to the README.md in the release SDK package.
2.19.4.2 Execution#
Mount NFS, after successful mounting, you can see the directory on both large and little cores
/sharefs, copy the compiled demosample_dpu_vo.elfto the NFS directory of the server, and the/sharefscorresponding ELF file can also be seen under the big core rttUse the command
./sample_dpu_vo.elfto start demo, and the depth map after DPU processing is displayed on the screen.Press ‘q’ to exit the demo.
2.20 OTA Remote Upgrade Demo#
2.20.1 Introduction to Demo#
OTA is over the air technology (Over The Air), which is different from on-site flashing, and the device firmware is updated through the network.
2.20.2 Feature description#
The flashing method and updated firmware are stored on the remote server for easy modification.
Supports package verification and encryption to ensure data integrity and security.
Disaster recovery scenarios are not supported. Common OTA disaster recovery mechanisms include A/B backup or recovery. K230 applications may use Norflash with a small capacity or eMMC with a large capacity. Specific usage scenarios can be developed based on this demo.
2.20.3 Dependent Resources#
Set up an HTTP server, such as using an HFS web file server.
2.20.4 Instructions for Use#
2.20.4.1 Make an upgrade package#
xxx@develop:~/k230/k230_sdk/tools/ota$ tree
.
├── ota_package
│   ├── rootfs
│   │   ├── etc
│   │   └── mnt
│   └── rtt_system.bin
├── ota_private.pem
├── ota_public.pem
├── ota_upgrade.sh
├── package_kpk.sh
└── README
How to make the upgrade package: Enter the k230_sdk/tools/ota directory, and execute ./package_kpk.sh ota_package to generate ota_package.kpk as the upgrade package. ota_package directory is created by itself and contains the partition firmware (such as rtt_system.bin) that needs to be upgraded, as well as the files for the file system of the small-core Linux. It is worth noting that the mechanism of upgrading is to download the upgrade package to memory and then decompress it for burning, limited by the memory capacity limitation, ota_package The file size of the included partition cannot be too large, no more than 20MB. It can be burned multiple times.
The partition firmware of different media refers to k230_sdk/tools/gen_image_cfg/xxx.cfg files, even if some partitions are not visible on small-core Linux systems, you can erase and write the entire disk space through the offset address.
ota_upgrade.sh is the upgrade script executed on the device side, if the partition is modified, you need to make corresponding modifications to this script.
ota_private the private key of the .pem upgrade package signature, the public key needs to be compiled or copied to the /etc/ directory of the device. REFER TO README
2.20.4.2 Compile device-side programs#
The OTA program on the device side is located in buildroot-ext/package/ota, and compiling buildroot will install the ota program to the /usr/bin directory of the file system, and the ota .cfg installed in the /etc/ directory. OTAs .cfg configurable download links for server-side upgrade packages and paths to public keys.
2.20.4.3 Execution#
Open the hfs .exe Add folder from disk to add a directory to which to copy the upgrade package.
First make sure that the development board network and the server can communicate normally. Execute OTA on the development board to complete the download of the upgrade package and upgrade the operation.
2.21 FFT Demo#
2.21.1 Introduction to Demo#
This demo is used to verify the use of FFT APIs and test FFT functions, see src/big/mpp/userapps/sample/sample_fft/
2.21.2 Feature description#
First, the FFT calculation is performed, and the IFT calculation is performed
2.21.3 Dependent Resources#
not
2.21.4 Instructions for Use#
2.21.4.1 Compilation#
Please refer to the README.md in the release SDK package.
2.21.4.2 Execution#
After the large and little core systems are up, execute the following command on the big core command line:
cd /sharefs/app;./sample_fft.elf
The output content of the big core serial port is as follows:
msh /sharefs/app>./sample_fft.elf 1 0
-----fft ifft point 0064  -------
    max diff 0003 0001
    i=0045 real  hf 0000  hif fc24 org fc21 dif 0003
    i=0003 imag  hf ffff  hif 0001 org 0000 dif 0001
-----fft ifft point 0064 use 133 us result: ok


-----fft ifft point 0128  -------
    max diff 0003 0002
    i=0015 real  hf 0001  hif fca1 org fc9e dif 0003
    i=0031 imag  hf 0001  hif fffe org 0000 dif 0002
-----fft ifft point 0128 use 121 us result: ok


-----fft ifft point 0256  -------
    max diff 0003 0001
    i=0030 real  hf 0000  hif fca1 org fc9e dif 0003
    i=0007 imag  hf ffff  hif 0001 org 0000 dif 0001
-----fft ifft point 0256 use 148 us result: ok


-----fft ifft point 0512  -------
    max diff 0003 0003
    i=0060 real  hf 0000  hif fca1 org fc9e dif 0003
    i=0314 imag  hf 0001  hif fffd org 0000 dif 0003
-----fft ifft point 0512 use 206 us result: ok


-----fft ifft point 1024  -------
    max diff 0005 0002
    i=0511 real  hf 0000  hif fc00 org fc05 dif 0005
    i=0150 imag  hf 0000  hif fffe org 0000 dif 0002
-----fft ifft point 1024 use 328 us result: ok


-----fft ifft point 2048  -------
    max diff 0005 0003
    i=1022 real  hf 0000  hif fc00 org fc05 dif 0005
    i=1021 imag  hf 0000  hif 0003 org 0000 dif 0003
-----fft ifft point 2048 use 574 us result: ok


-----fft ifft point 4096  -------
    max diff 0005 0002
    i=4094 real  hf 027b  hif 041f org 0424 dif 0005
    i=0122 imag  hf 0000  hif 0002 org 0000 dif 0002
-----fft ifft point 4096 use 1099 us result: ok