11. CanCollectorPlus#
Note: CanCollectorPlus is only applicable to Linux+RT-Smart dual system, not to pure RT-Smart single system;
11.1 Introduction to CanCollectorPlus#
Canaan Technology has developed online training platforms for the K230, such as the Canaan Developer Community (canaan-creative.com) and AI CUBE, to assist users in efficiently transitioning from data to deployment in specific visual scenarios. Users only need to prepare data for the relevant scenario to achieve end-to-end deployment on the board. The quality and distribution of user data directly affect the deployment results. Sometimes, using curated public datasets for training can lead to suboptimal performance on the K230 development board, or even significant discrepancies. This issue arises mainly because the camera equipment on the development board differs from that used to collect public datasets, resulting in inconsistencies in data distribution, color, lighting, perspective, and resolution between the deployment and training phases.
To address this issue, users can manually collect data using the development board, annotate it, and then train the model. This ensures that the data distribution during deployment is similar to the training data, reducing discrepancies and improving deployment performance. CanCollectorPlus is the 2.0 version of a visual data collector developed for the CANMV-K230 development board, featuring video stream preview functionality that allows collectors to adjust the collection position flexibly.
11.2 Quick Start#
11.2.1 Preparation#
Burn the CANMV-K230 development board image onto an SD card: k230_canmv_sdcard_v1.1.0_nncase_v2.4.0.img.gz. Other versions of the canmv image can also be used, as this tool is not dependent on a specific version, and any canmv image version can be run.
Download the CanCollectorPlus no-installation resource package from: https://kendryte-download.canaan-creative.com/developer/common/CanCollectorPlus.zip
Install MobaXterm for serial communication, available at: https://mobaxterm.mobatek.net
11.2.2 Network Configuration#
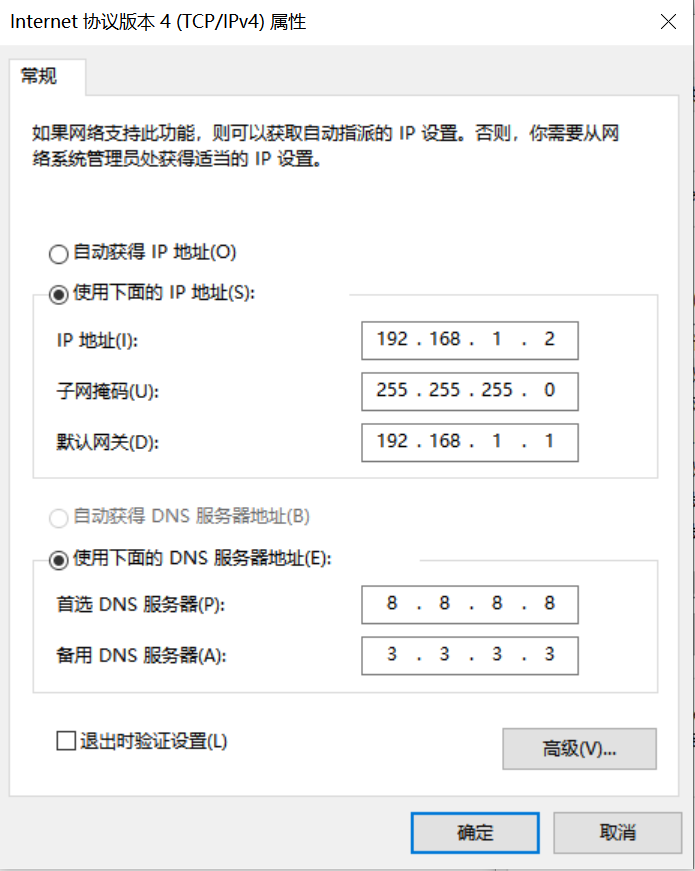
11.2.2.1 PC Network Configuration#
Control Panel -> Network and Sharing Center -> Change adapter settings -> Ethernet -> Right-click Properties -> Select (TCP/IPv4) -> Properties
Configure IP address, subnet mask, gateway, and DNS server address:
11.2.2.2 Development Board Network Configuration#
Power on the development board and enter the big-core to small-core communication serial port. Enter the small-core command line and execute:
# Check if eth0 exists
ifconfig
# Configure the development board IP to be in the same subnet as the PC
ifconfig eth0 192.168.1.22
# Check IP configuration
ifconfig
11.2.3 File Copy#
Unzip the CanCollectorPlus.zip package and copy the extracted cancollectorplus_onboard.zip files to the /sharefs directory on the development board.
11.2.3.1 Offline Copy#
For offline copying, power off the board, remove the SD card, insert it into a card reader, unzip cancollectorplus_onboard.zip, and directly copy and paste from the PC.
11.2.3.2 LAN Copy#
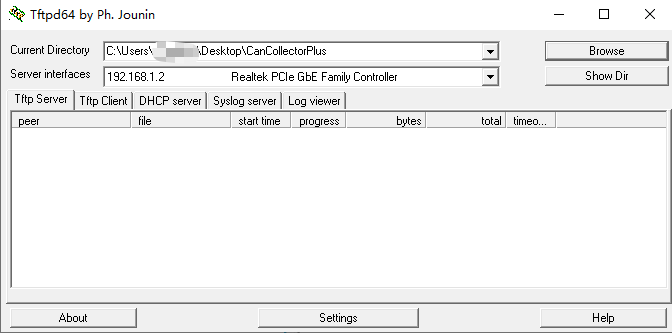
For LAN copying, first install tftpd64, available at: https://bitbucket.org/phjounin/tftpd64/downloads/Tftpd64-4.64-setup.exe
Connect the PC and the CanMV-K230 development board with an Ethernet cable.
Start tftpd64 and configure the directory for the files to be transferred and the service network card:
sharefs Explanation
# Enter the small-core root directory
cd /
# List directories
ls
# The sharefs directory is shared between the big-core and small-core, so files copied to the sharefs directory from the small-core are also visible to the big-core
cd /sharefs
File Transfer
# Configure network
ifconfig eth0 192.168.1.22
# Execute the following code in the small-core serial port
cd /sharefs
# Transfer cancollectorplus_onboard.zip from the PC's tftpd64 configured directory to the current directory on the development board
tftp -g -r cancollectorplus_onboard.zip 192.168.1.2
Unzip:
unzip cancollectorplus_onboard.zip
11.2.4 PC-side Startup#
Unzip the CanCollectorPlus.zip package and enter the CanCollectorPlus directory:
# Execute in command line
start CanCollectorPlus.exe
# Or double-click CanCollectorPlus.exe to start the PC-side collection interface
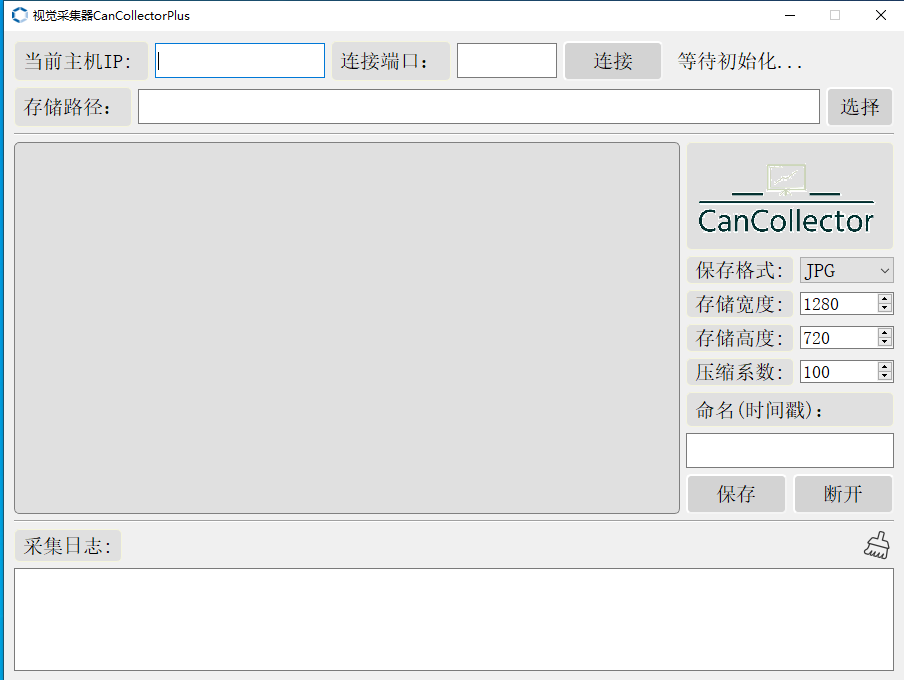
After starting the interface, set the current PC’s IP and port, and set the storage path for collected images:
11.2.5 Board-side Startup#
Execute on the small-core:
# ./sender <PC IP> <Port>
./sender 192.168.1.2 8080
Execute on the big-core:
# ./main.elf <debug_mode>
# debug_mode: 0 for no debugging, 1 for simple debugging, 2 for complex debugging
./main.elf 1
11.2.6 Data Collection#
Configure the host IP and port on the PC side, or directly click the connect button to use the default configuration to establish a connection between the PC and the K230. The left side will display the K230 video stream in real-time.
Configure collection parameters, select suitable images, and click the save button to complete the collection. The collected images will be saved in the selected directory.
Collection Example:
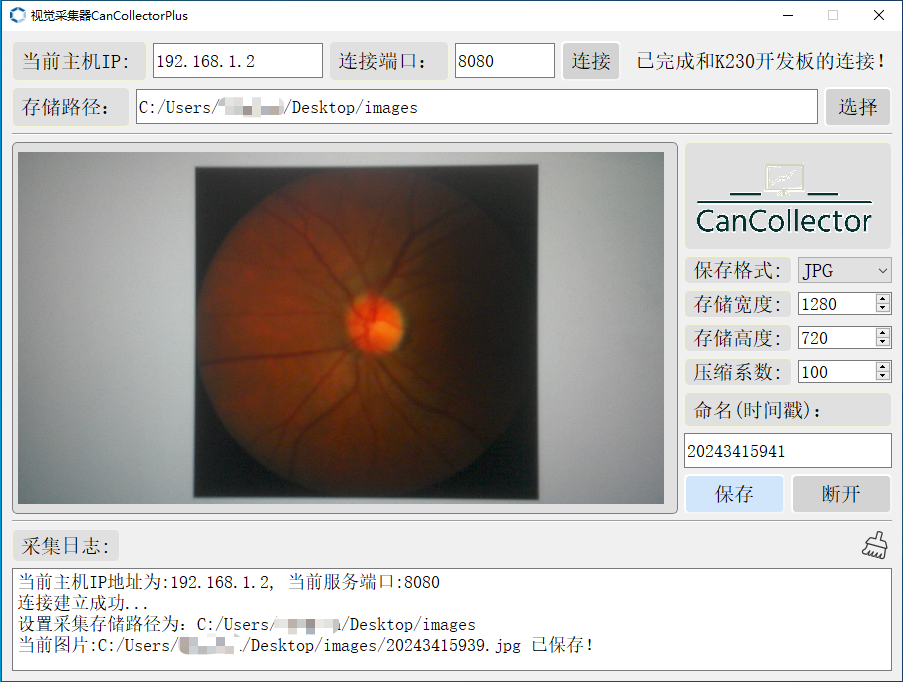
Save Results:
To exit collection, click the disconnect button, enter ‘q’ and press Enter in the big-core command line, and do the same in the small-core command line.
After obtaining the collected images from the development board camera, you can annotate them and complete training on the online platform or AI CUBE to obtain a deployment package for the K230.
11.2.7 Effect Comparison#
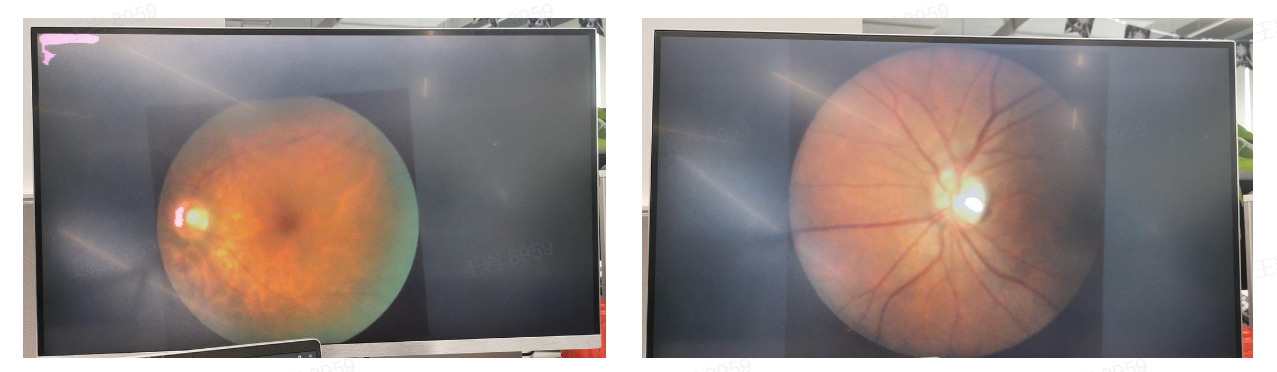
For the task of eye disease segmentation, the deployment results of models trained using public datasets and those trained using data collected with CanCollectorPlus are compared as follows:
The deployment effect of the model trained with public datasets is shown below:
The deployment effect of the model trained with data collected using CanCollectorPlus is shown below:
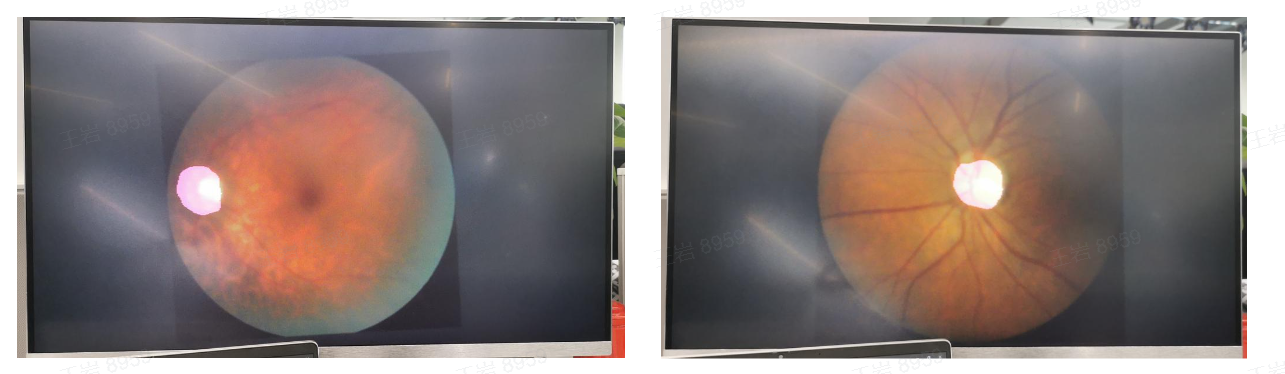
From the comparison above, we can clearly see that the model trained with public datasets performs poorly, whereas the model trained with data collected and annotated using CanCollectorPlus can more accurately segment the central lesion area during deployment.