4. TCP Server Example Explanation#
1. Environment Preparation#
To ensure a smooth demonstration of TCP communication, we need to confirm that the following environment is correctly configured:
1.1 Hardware Connection#
Ensure that your CanMV development board and computer are connected to the same router or switch via Ethernet cable, forming a local area network (LAN).
Ensure that the router or switch is functioning properly to guarantee network connection stability.
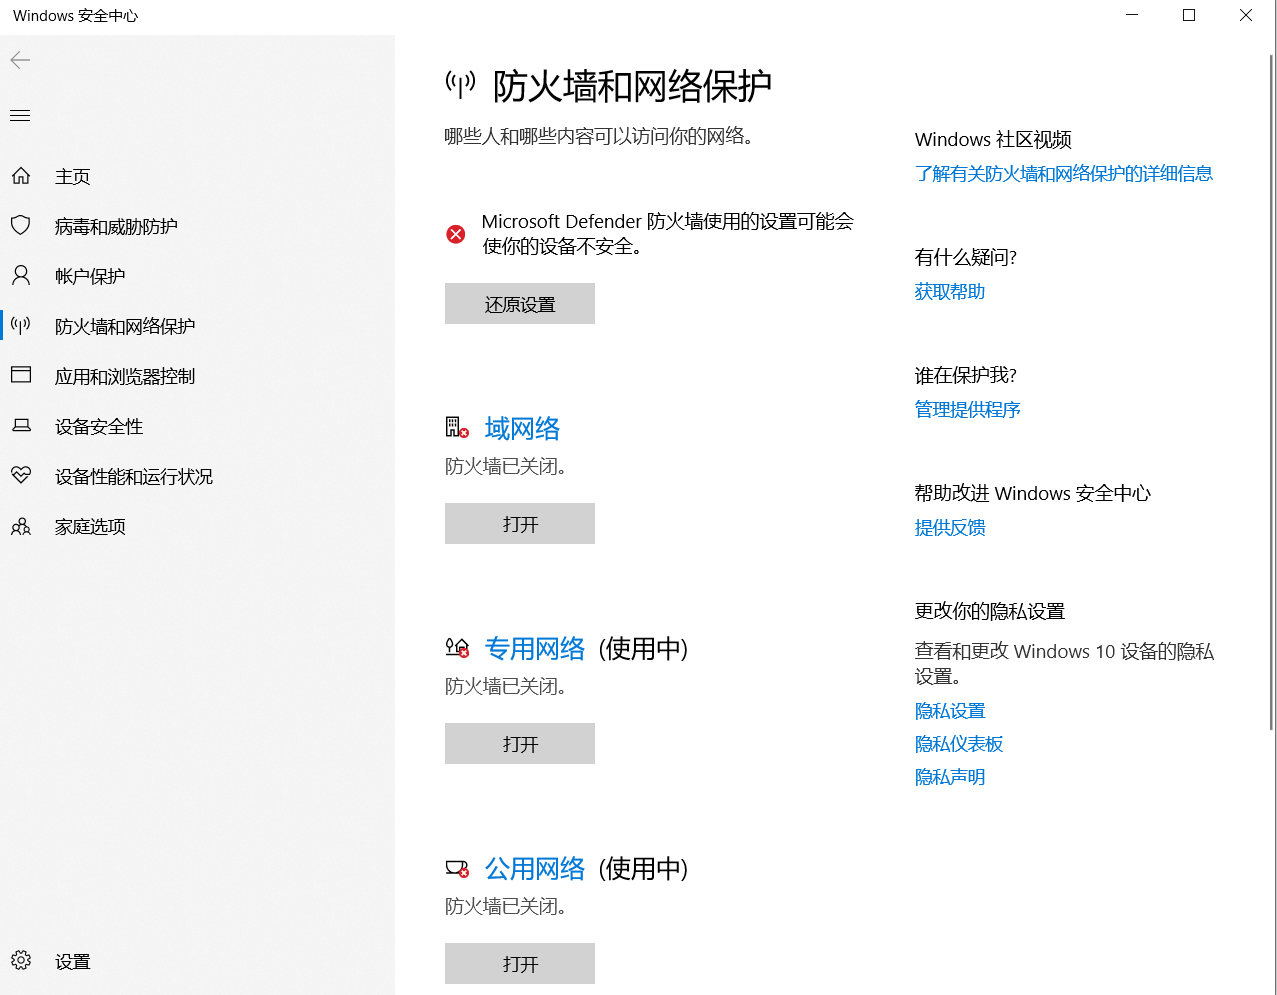
1.2 Disable Firewall#
To avoid the firewall blocking TCP communication, it is recommended to temporarily disable the firewall on your computer.
1.3 Tool Preparation#
Download and install NetAssist Network Debugging Assistant as a network communication testing tool to help achieve network data transmission and reception.
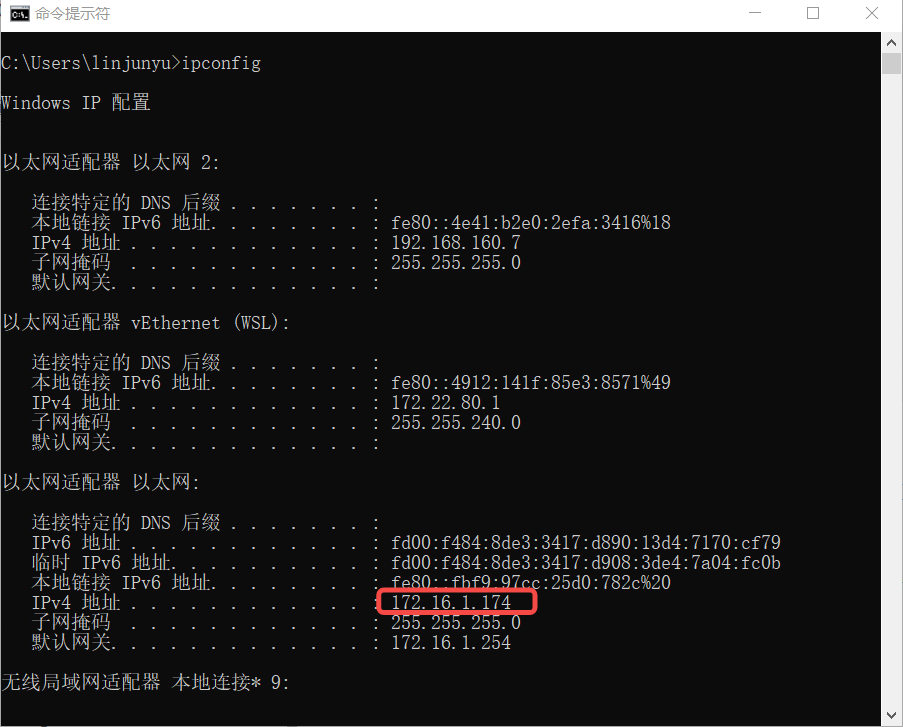
1.4 Obtain IP Address#
Open the Command Prompt (CMD), enter
ipconfig, and query and record the IP address of the computer’s network card for subsequent configuration and testing.
2. Server Example Analysis#
2.1 Import Necessary Libraries#
import socket
import network
import time
socket: Provides the functionality to create sockets, which is the foundation of network communication.
network: Used to configure network interfaces (such as LAN and WLAN).
time: Can be used for handling delay operations or network timeout control.
2.2 Define Service Content#
CONTENT = b"""
Hello #%d from k230 canmv MicroPython!
"""
Defines the content that the server will send to the client.
%dis used to insert the current connection count.
2.3 Create and Configure the Server#
def server():
    ip = network_use_wlan(True)  # Obtain the IP of the network interface

    # Create a socket and bind it to the specified address and port
    s = socket.socket(socket.AF_INET, socket.SOCK_STREAM, 0)
    s.setsockopt(socket.SOL_SOCKET, socket.SO_REUSEADDR, 1)  # Allow address reuse
    ai = socket.getaddrinfo(ip, 8080)  # Get address information
    addr = ai[0][-1]  # Extract address and port number
    s.bind(addr)  # Bind the socket to the address and port
    s.listen(5)  # Start listening, allowing up to 5 clients to wait for connection

    print("tcp server %s port:%d\n" % (ip, 8080))
This part of the code creates a TCP server and binds it to the development board’s IP address and port 8080.
listen(5)indicates that up to 5 clients are allowed to wait for connection.
2.4 Handle Client Connections#
counter = 1
while True:
    # Accept client connection
    res = s.accept()
    client_sock, client_addr = res  # Get client socket and address
    print("Client address:", client_addr)

    client_sock.setblocking(False)  # Set non-blocking mode

    # Send message to client
    client_sock.write(CONTENT % counter)

    while True:
        try:
            h = client_sock.read()  # Try to read client data
            if h:
                print(h)
                client_sock.write(b"recv: " + h)  # Reply to client

            if b"end" in h:  # If "end" is received, close the connection
                client_sock.close()
                break
        except Exception as e:
            print("Error:", e)
            time.sleep(0.1)  # Wait a bit after encountering an error

    counter += 1
    if counter > 10:
        print("server exit!")
        s.close()  # Close the server
        break
This code segment handles each client connection and loops to listen for data while communicating with the client. When the “end” character is received, the server closes the connection with that client.
To handle exceptions in non-blocking mode,
try-exceptis used to manage potential errors during data reading.
2.5 Complete Code#
import socket
import network
import time, os

CONTENT = b"""
Hello #%d from k230 canmv MicroPython!
"""

def network_use_wlan(is_wlan=True):
    if is_wlan:
        sta = network.WLAN(0)
        sta.connect("Canaan", "Canaan314")
        print(sta.status())
        while sta.ifconfig()[0] == '0.0.0.0':
            os.exitpoint()
        print(sta.ifconfig())
        ip = sta.ifconfig()[0]
        return ip
    else:
        a = network.LAN()
        if not a.active():
            raise RuntimeError("LAN interface is not active.")
        a.ifconfig("dhcp")
        print(a.ifconfig())
        ip = a.ifconfig()[0]
        return ip

def server():
    ip = network_use_wlan(True)

    counter = 1
    s = socket.socket(socket.AF_INET, socket.SOCK_STREAM, 0)
    s.setsockopt(socket.SOL_SOCKET, socket.SO_REUSEADDR, 1)
    ai = socket.getaddrinfo(ip, 8080)
    addr = ai[0][-1]
    s.bind(addr)
    s.listen(5)
    print("tcp server %s port:%d\n" % (ip, 8080))

    while True:
        res = s.accept()
        client_sock = res[0]
        client_addr = res[1]
        print("Client address:", client_addr)
        client_sock.setblocking(False)

        client_stream = client_sock
        client_stream.write(CONTENT % counter)

        while True:
            h = client_stream.read()
            if h:
                print(h)
                client_stream.write(b"recv: " + h)
            if b"end" in h:
                client_stream.close()
                break

        counter += 1
        if counter > 10:
            print("server exit!")
            s.close()
            break

server()
3. Operation Phenomenon and Instructions#
Run the above server code and observe that the serial terminal will print the server’s IP address and port number.

Open NetAssist Network Debugging Assistant, configure it as a TCP client, and enter the IP address and port number displayed by the server terminal, then click “Connect”:
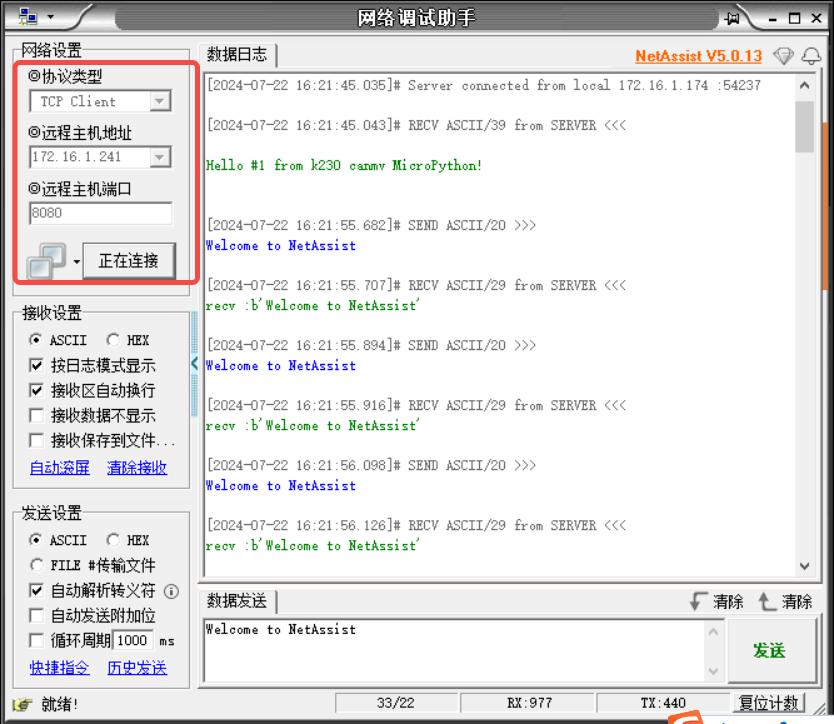
After a successful connection, the client will receive a message from the server.